


很多使用Word办公的用户很好奇修订颜色该如何设置?下面就介绍一下Word2019修订颜色设置方法,相信对大家会有所帮助的。
Word2019修订颜色设置方法

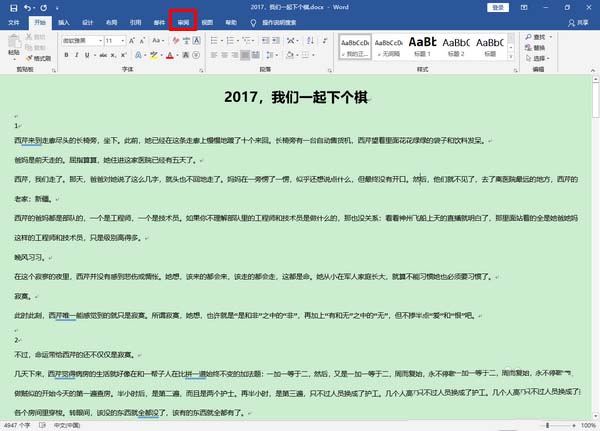
1、首先,用 Word 2019 打开文档之后,点击菜单“审阅”。
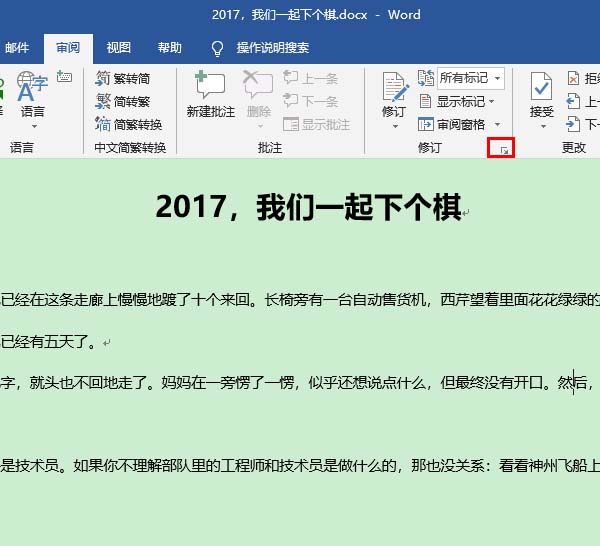
2、然后,在审阅菜单项下,点击右下角的箭头。
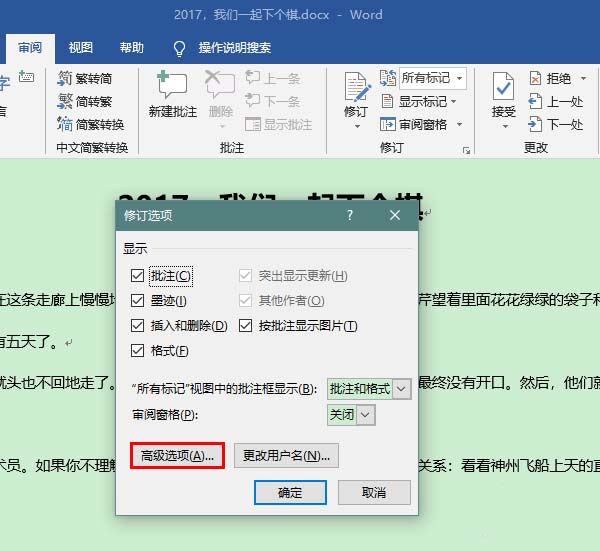
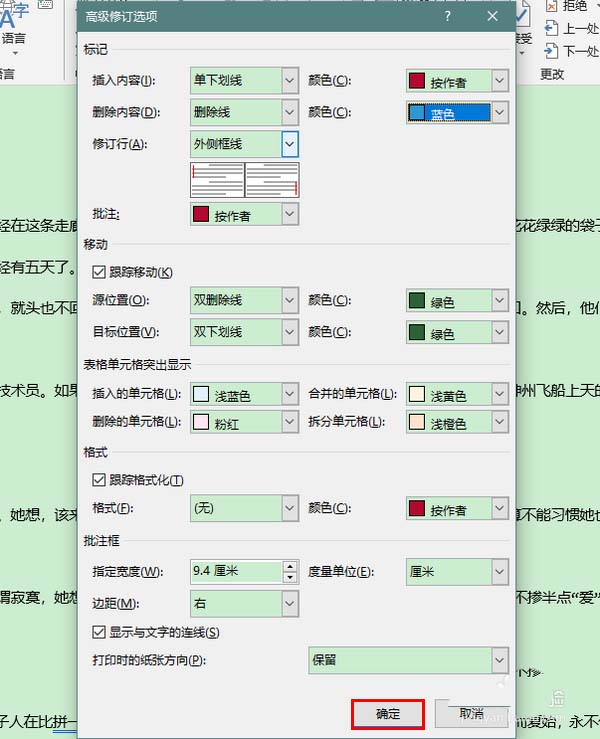
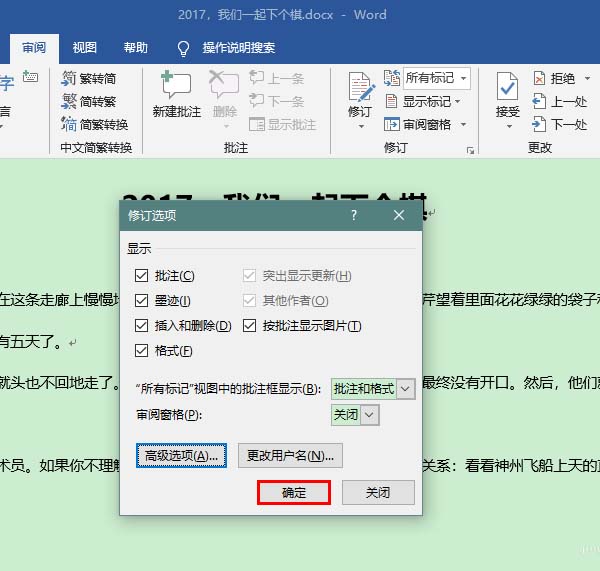
3、这时,将会弹出一个修订选项窗口。在这个窗口中点击“高级选项”。
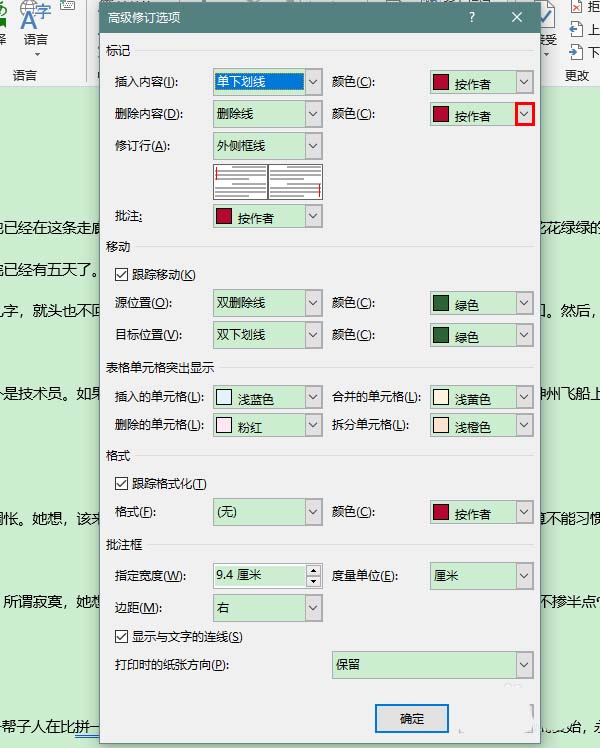
4、打开高级修订选项窗口之后,根据自己的需要点击下拉箭头修改指定项目的颜色,比如说,在这里我们将“删除内容”的颜色由红色改为蓝色。 颜色修改完毕后,点击“确定”关闭高级修订选项窗口。
5、接着,再次点击“确定”关闭之前打开的修订选项窗口。
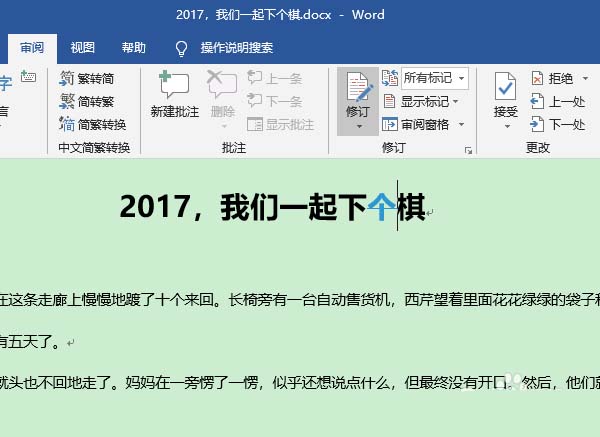
6、随后,我们再对文档进行修订,就会发现修订颜色已经更改生效了。
相信现在看了上面的内容后,大家都了解了吧,希望对大家有帮助哦!