


估计有的用户还不了解WIN10无线网络受限制怎样解决,下文小编就分享WIN10无线网络受限制的处理方法,希望对你们有所帮助哦。
WIN10无线网络受限制的处理方法

1、在桌面上点击【网络】右键,然后再选择【属性】;

2、进入网络和共享中心,点击【连接】那里;

3、点击【无线属性】;

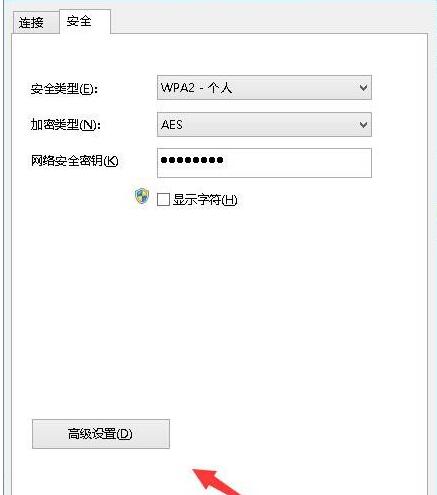
4、点击安全选项卡,再点击【高级设置】按钮;
5、勾选【为此网络启用联邦信息处理标准(FIPS)兼容】这一项,然后确定,断开笔记本电脑WIFI网络,再重新开启应该就能正常连接了。
以上这里为各位分享了WIN10无线网络受限制的处理技巧。有需要的朋友赶快来看看本篇文章吧。