


你们知道edius如何为素材加上边缘划像的转场效果吗?怎么样开启这项功能呢?对此感兴趣的用户可以随小编去下文看看edius为素材加上边缘划像的转场效果的详细方法。
edius为素材加上边缘划像的转场效果的详细方法

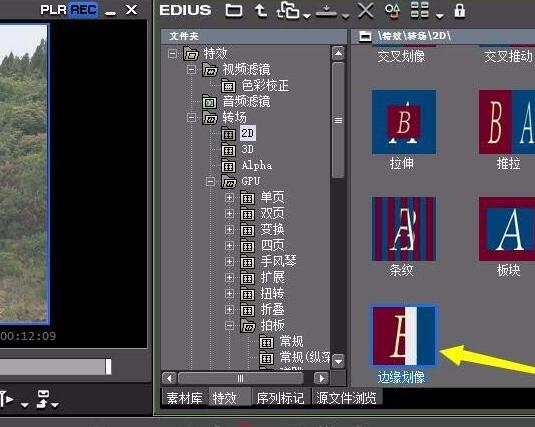
1、首先就是边缘划像的位置,边缘划像位于特效-转场-2D里的最后一个
2、把其拖动到两段视频素材的中间,就形成最基本的边缘划像效果

3、双击这个转场特效,可以打开其属性调节窗口
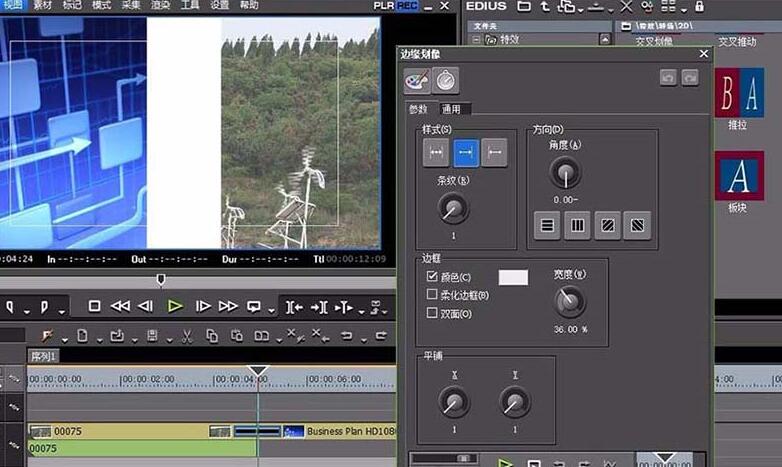
4、可以调节诸多设置,比如边框的颜色

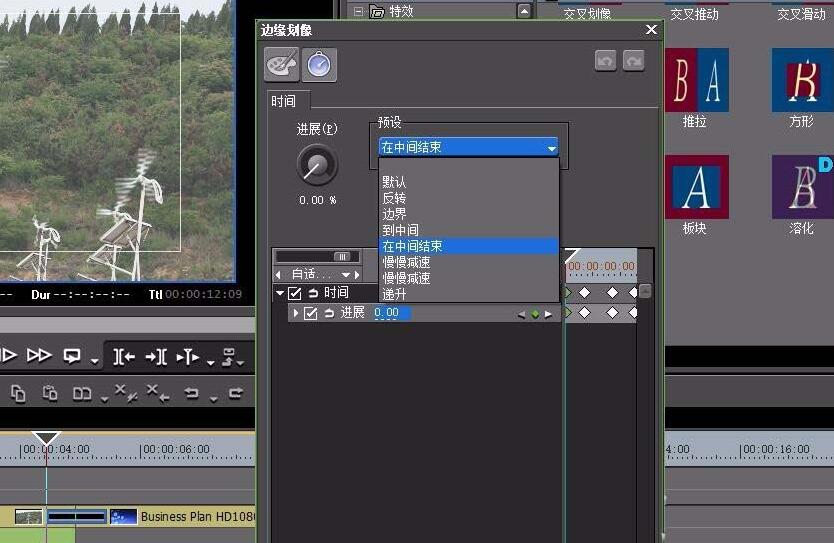
5、再有就是专场方式的各种预设,可以自由选择
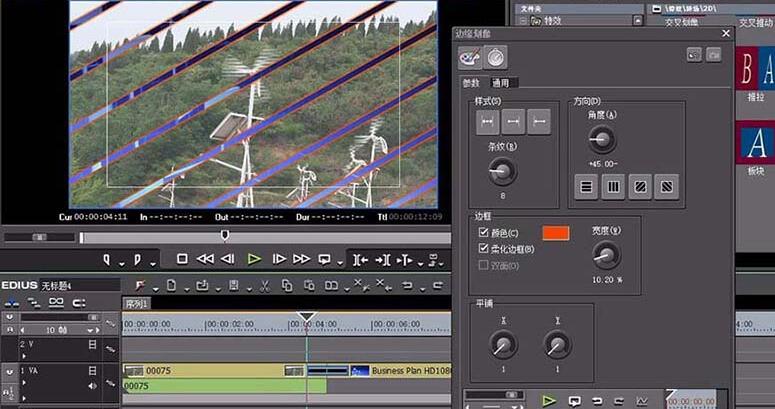
6、设置完成之后,都能在左上角实时预览整体效果
上面就是小编为大家带来的edius为素材加上边缘划像的转场效果的详细教程,一起来学习学习吧。相信是可以帮助到一些新用户的。