


亲们或许不知道eclipse如何去掉xml/js验证的详细操作,那么今天小编就讲解eclipse去掉xml/js验证的操作步骤哦,希望能够帮助到大家呢。
eclipse去掉xml/js验证的详细方法

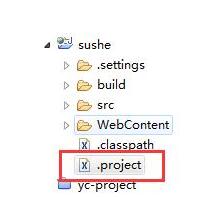
打开eclipse,在你的项目下面找到 .project 文件,双击打开这个文件。
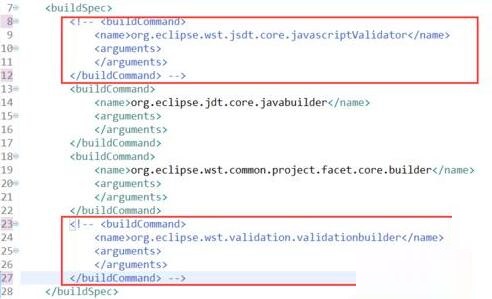
打开 .project文件后,注释掉 org.eclipse.wst.jsdt.core.javascriptValidator 和org.eclipse.wst.validation.validationbuilder,这样就去掉了javascript 和 builder的验证了。
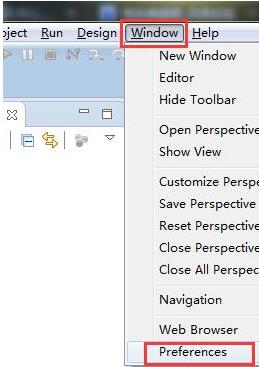
继续操作,在菜单栏里的window右键选择Preferences。

点击 Validation 选项
点击 Disable All ,再点击 Apply,最后点击 OK。到这就去掉了所有的验证了。
还不了解eclipse去掉xml/js验证的详细步骤的朋友们,不要错过小编带来的这篇文章哦。