


刚学习Altium Designer的朋友,可能不清楚智能交互式布线放到快捷工具栏,今天小编就讲解Altium Designer智能交互式布线放到快捷工具栏的操作方法,相信大家通过学习,在以后的操作中一定会得心应手。
Altium Designer智能交互式布线放到快捷工具栏的操作方法

1、打开Altium Designer软件,会看到如图所示的智能交互式布线工具,有些人的这一选项可能没有。

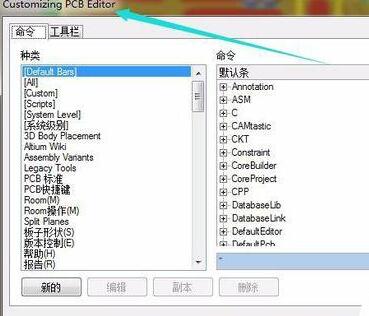
2、在快捷工具栏的空白处点击鼠标右键,将会出现customize选项,
3、点开customize这一按钮,将会出现customizing PCB editor对话框,
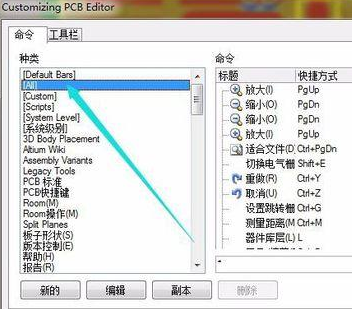
4、然后把鼠标光标放置到种类下面的ALL选项,如图所示:
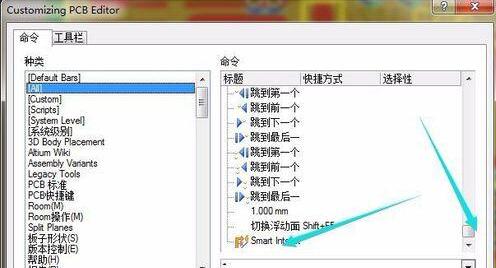
5、再把鼠标光标移动到命令一栏,并拖动右边的上下拉按钮,找到smart inter工具栏,
6、然后将鼠标定位在smart inter选项,并拖动到工具栏。调整后的智能交互式布线工具如图所示:

7、最后我们就可以使用智能交互式布线工具进行布线了。
还不了解Altium Designer智能交互式布线放到快捷工具栏的操作步骤的朋友们,不要错过小编带来的这篇文章哦。