


在Axure RP 8.0椭圆形元件如何设置透明度阴影等属性呢?下面就为大家分享Axure RP 8.0椭圆形元件设置透明度阴影等属性的图文教程,有需要的可以来了解了解哦。
Axure RP 8.0椭圆形元件设置透明度阴影等属性的操作教程

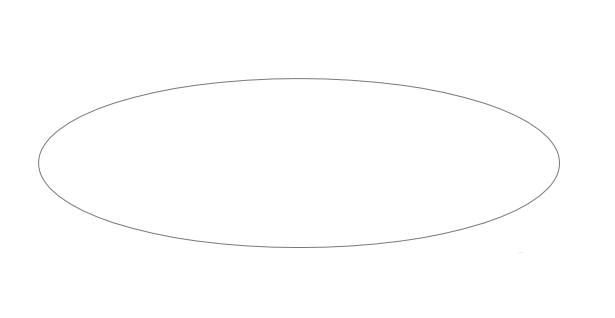
打开Axure RP 8.0,在元件库中找到“椭圆形”,拖一个到画布上,如图所示:
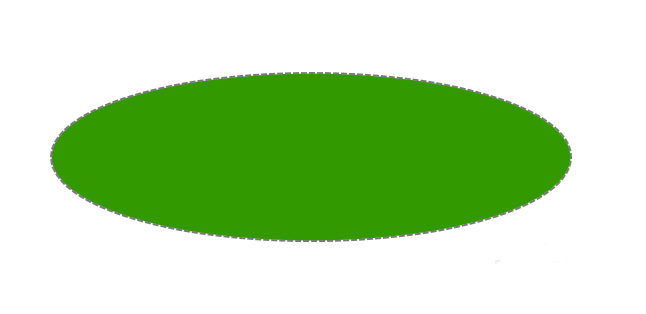
调整椭圆形,选中“椭圆形”,选择绿色为填充色,如图所示:

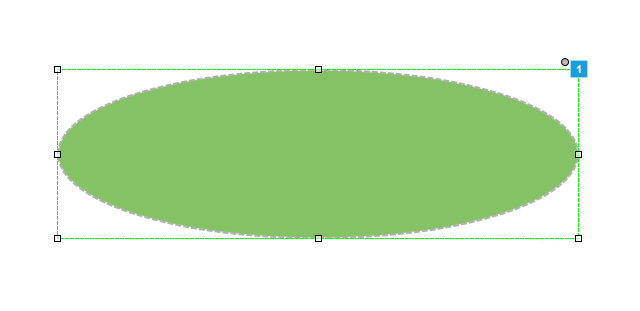
选中“椭圆形”元件,设置边框为粗线、虚线框,如图所示:
再次选中“椭圆形”元件,修改其透明度为60%,如图所示:

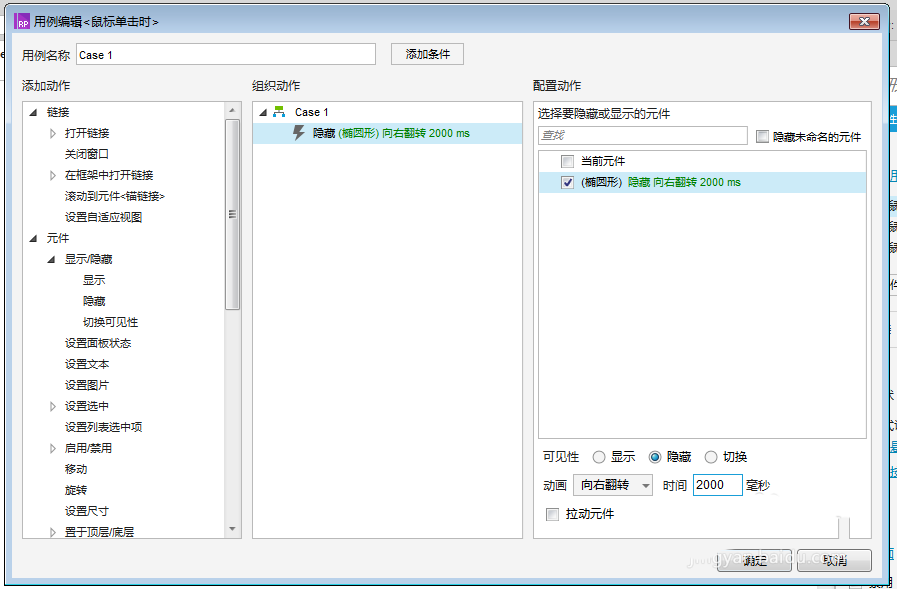
选择“椭圆形”元件,在“属性”选项卡双击“鼠标单击时”,打开用例编辑窗口;勾选椭圆形,设置隐藏、动画和时间,如图所示:
预览该模型页面,查看页面效果,点击椭圆形,这时椭圆形发生变化,如图所示:
还不了解Axure RP 8.0椭圆形元件设置透明度阴影等属性的详细步骤的朋友们,不要错过小编带来的这篇文章哦。