


如何在Windows系统中安装配置Git软件?下面笔者就分享了Windows系统中安装配置Git软件的操作方法,不懂的朋友一起来看看吧。
Windows系统中安装配置Git软件的操作方法

安装Git
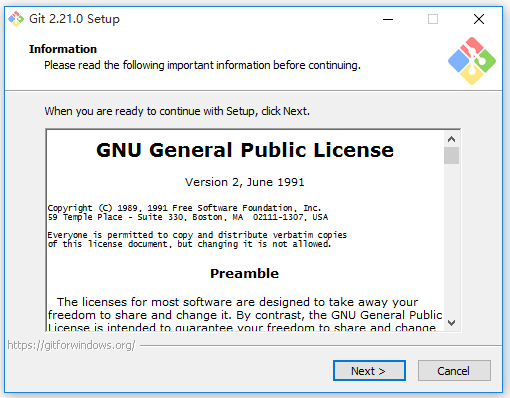
首先根据电脑系统版来下载Git软件,解压压缩包,双击.exe文件,根据向导提示操作,

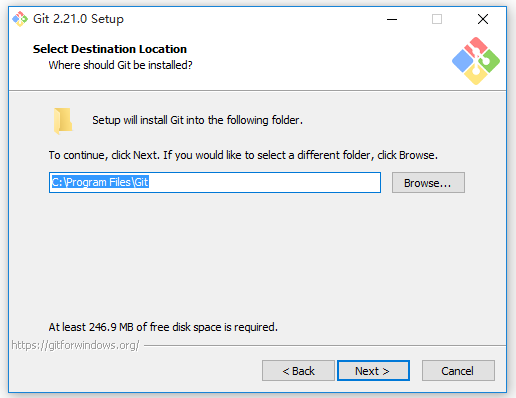
自行选择软件安装位置,点击【Next】,
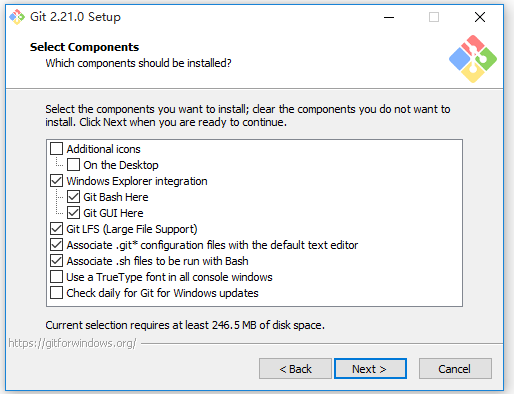
勾选安装组件,推荐选择默认组件,点击【Next】,
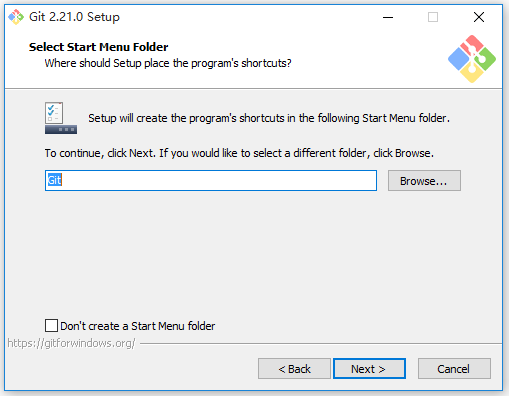
创建开始菜单目录,点击【Next】,
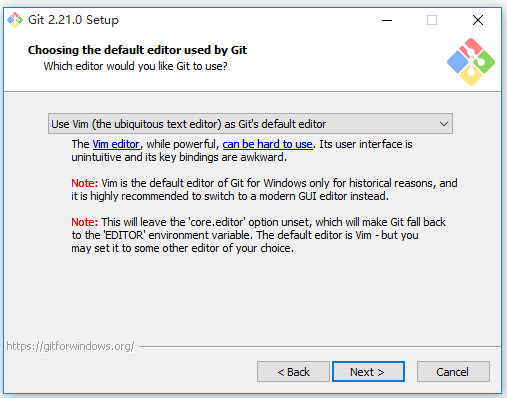
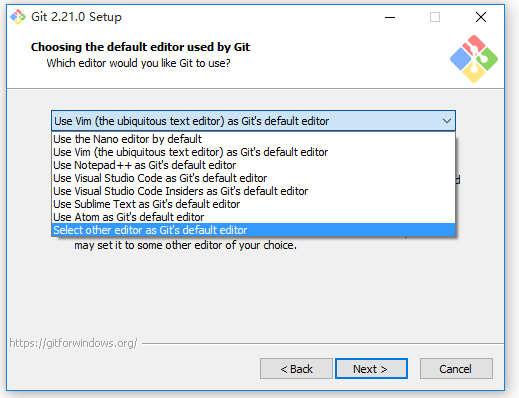
选择git使用的编辑器,从上往下依次是Nano、Vim、Notepad++、Visual Studio Code、Visual Studio Code insiders、Sublime Text、atom,以上选项点击蓝色字体可以进入对应官网,
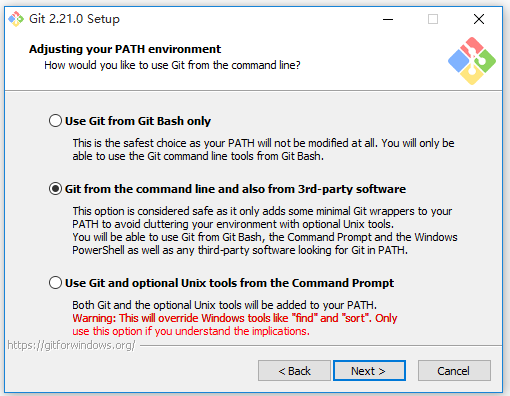
配置环境,推荐选择前两个,第一个最安全,第二个相对安全,点击【Next】,
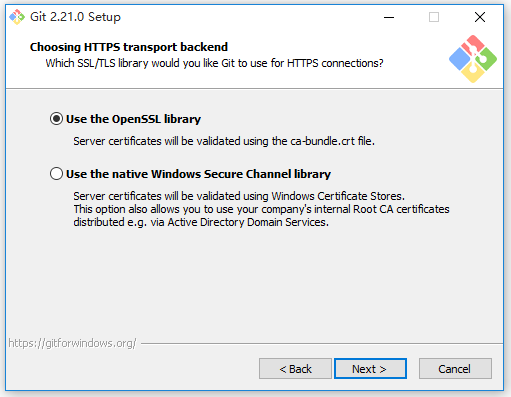
选择git传输方式,点击【Next】,
配置行结束转换,git在检出文本文件和提交文本文件时的转换方式。Windows和Unix行尾结束符是不一样的,前者是nr,后者是n,第一项就是检出成Windows文件,提交成Linux文件,第二项是提交Linux文件。

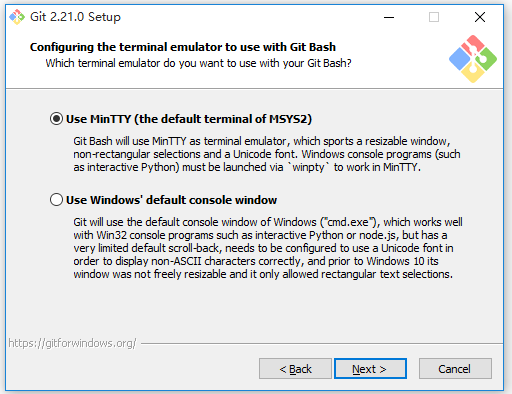
配置git Bash终端模拟器,推荐MinTTY,
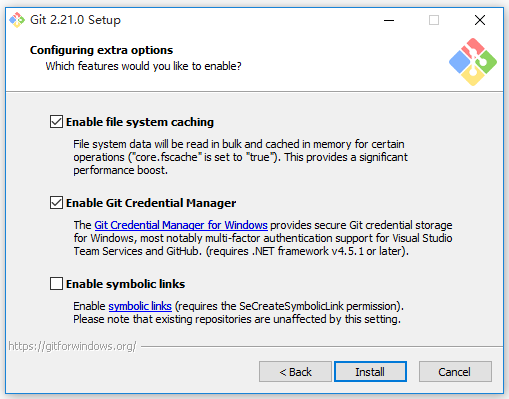
进行额外配置,选择默认就行,点击【Install】,
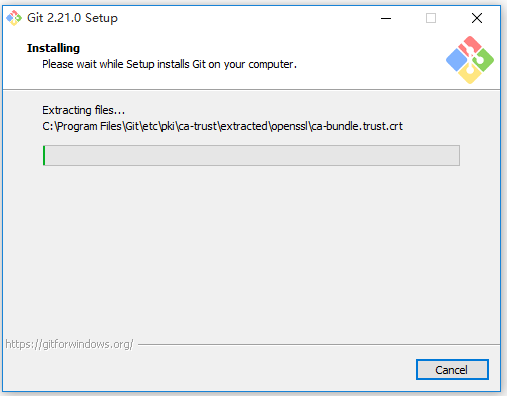
开始安装软件,耐心等待即可,
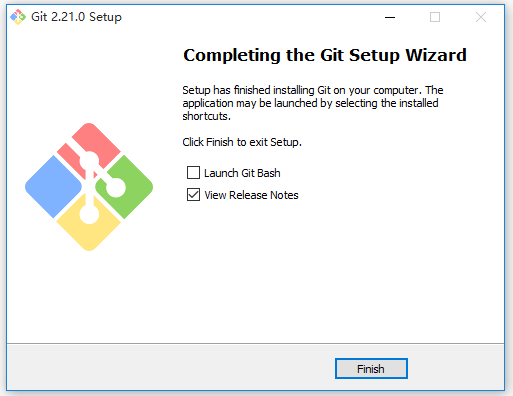
软件安装完成,点击【Finish】即可。
使用鼠标右击桌面,弹出右键菜单,我们可以看到Git GUI Here和Git Bash Here选项,说明Git安装成功。
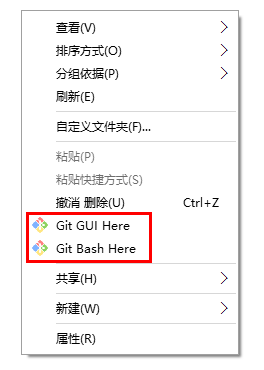
安装完成,大家需要设置自己的git账号和邮箱,否则无法正确使用!
配置Git
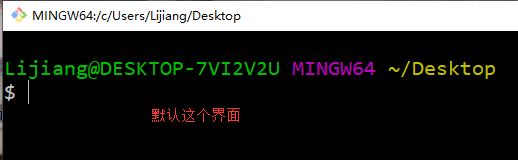
点击【Git Bash Here】,进入如图窗口,
输入命令,
git config --global user.name"lijiang"
git config --global user.email"2906718132@qq.com"

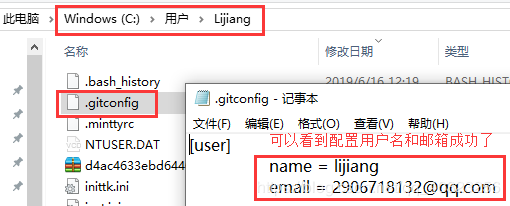
查看用户名和邮箱是否配置成功,路径:C:UsersLijiang,找到.gitconfig文件并打开,如果出现下面这些内容,说明成功了。
以上就是小编给大家带来的全部内容,大家都学会了吗?