


今天给大家讲的是360安全卫士中打开防蹭网模式的设置方法,对360安全卫士感兴趣的同学们就一起学习下具体方法吧!
360安全卫士中打开防蹭网模式的操作教程

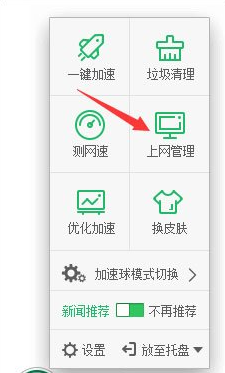
最新版的360安全卫士有个桌面加速球,鼠标右键点击加速球,选择“上网管理”;
这时会跳出360流量防火墙,我们点击“防蹭网”;
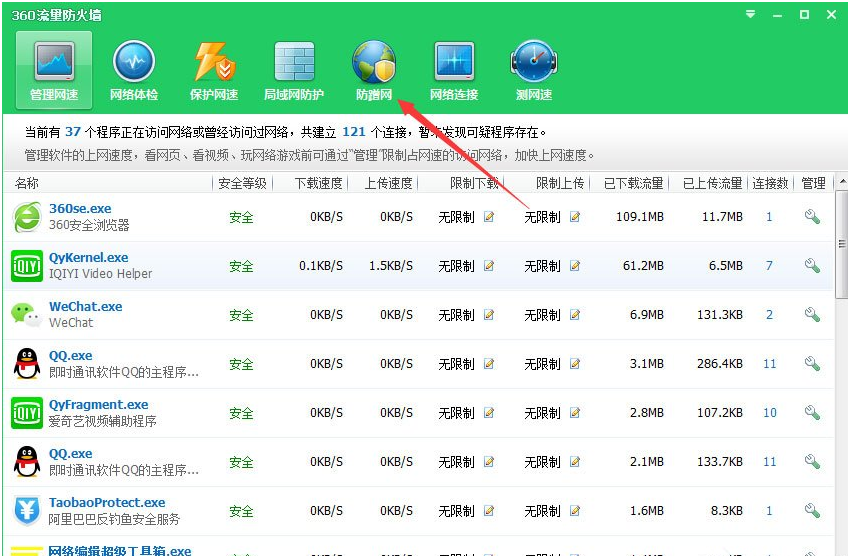
或者你也可以点击360安全卫士图标,在功能大全里找到流量防火墙的标志;


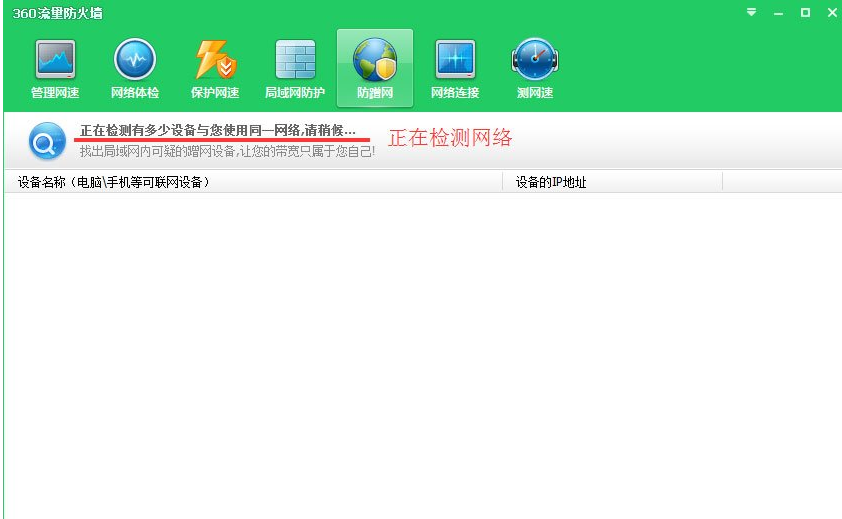
然后我们选择防蹭网“立即启用”就可以了;

接着我们点击启用就会自动搜索当前的无线网络,如图:
等待检测完成就可以看到你的无线网络有多少连接,如图:
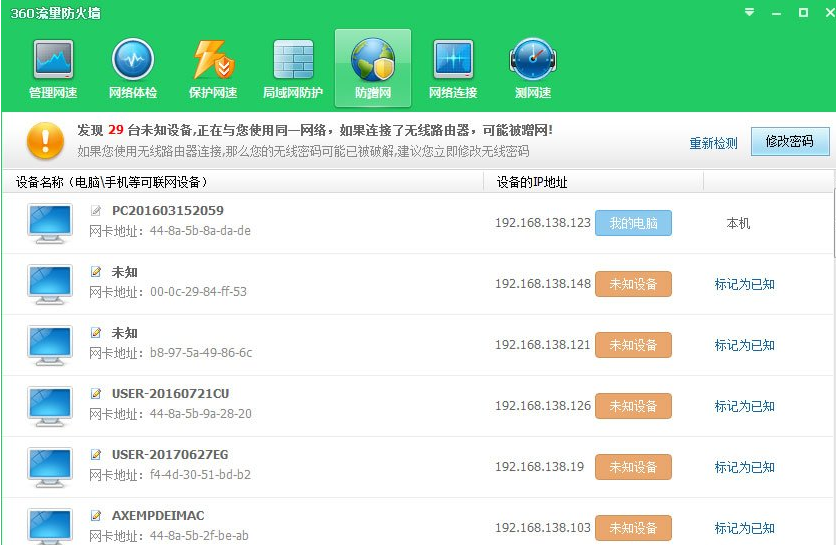
在这个列表中可以看到你的网络是不是正常的,如果搜索的未知的网络,而你知道这网络是正常的可以将该电脑标识成已知,如图:

若是你的列表你有不知道的无线连接进来可以点击修改密码,如图:
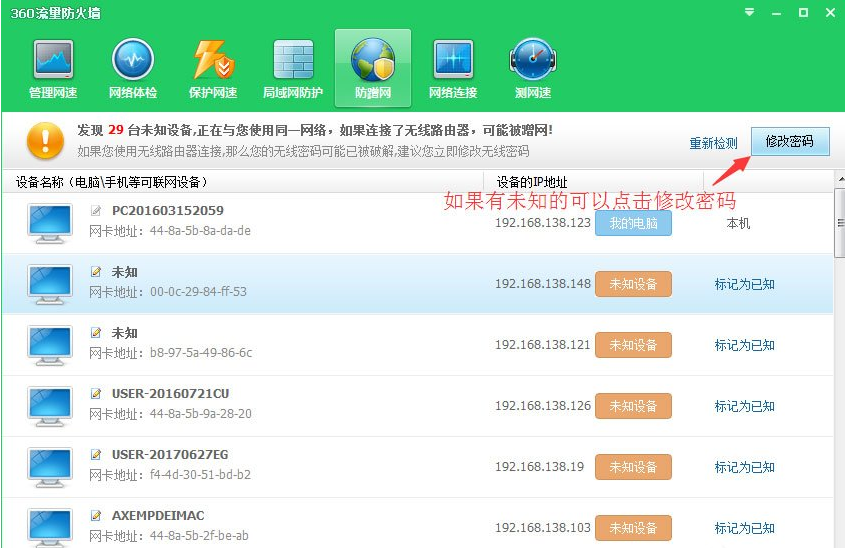
这里会显示出可能在蹭网的电脑,如果不是你允许的设备,可以点“修改密码”来对路由器进行重新设置,该页面会说明修改方法。这样我们的网络安全性就大大增加,且上网速度顺畅稳定了。
若是你开启可无限网络,最好修改下密码,你的密码可能已经泄漏了
看完了上文为你们讲述的360安全卫士中打开防蹭网模式的具体操作步骤,你们是不是都明白了呀!