


最近很多朋友咨询关于UltraISO软碟通制作u盘启动盘,今天的这篇教程就来聊一聊这个话题,希望可以帮助到有需要的朋友。
UltraISO软碟通制作u盘启动盘的操作教程

第一种方法:
我们首先进入UltraISO软件;
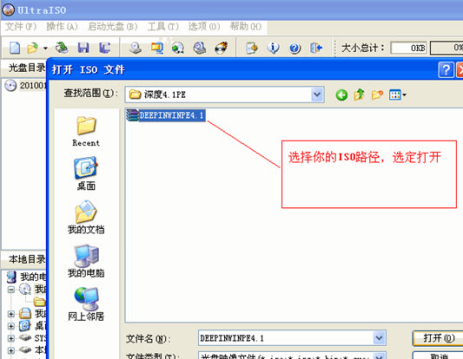
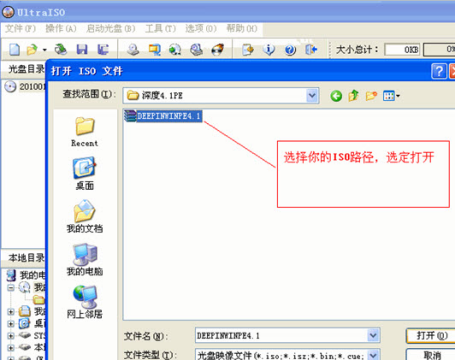
然后我们点击菜单【文件】-----打开.....
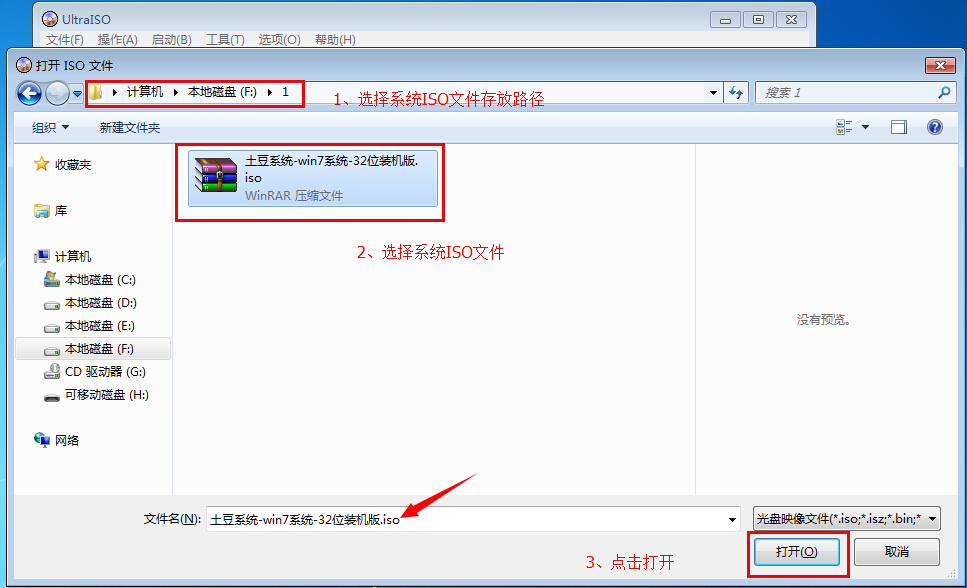
选择你的ISO路径,选定打开;
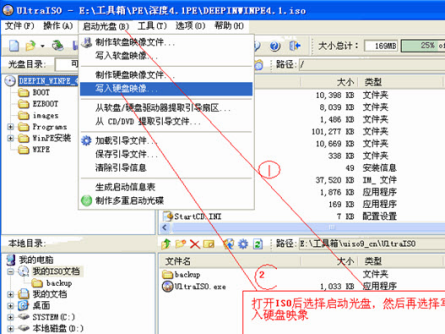
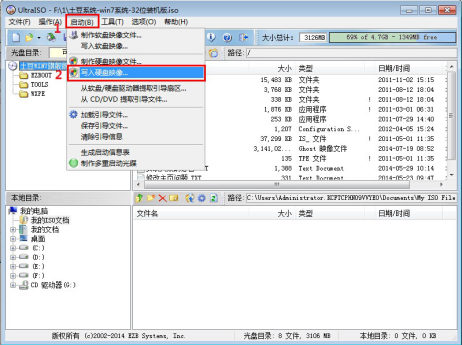
接着我们点击菜单【启动光盘】----写入硬盘映像
打开ISO后选择启动光盘,然后再选择写入硬盘映像;
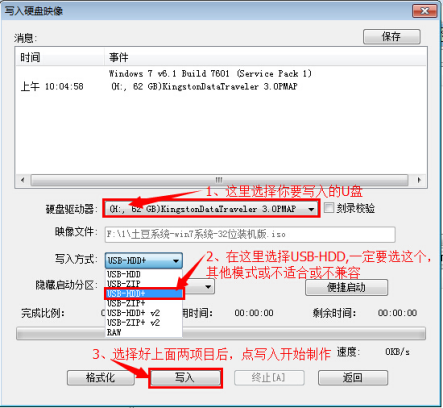
这时我们选择硬盘驱动器(就是你的U盘盘符);
再点击【格式化】,格式化一下U盘
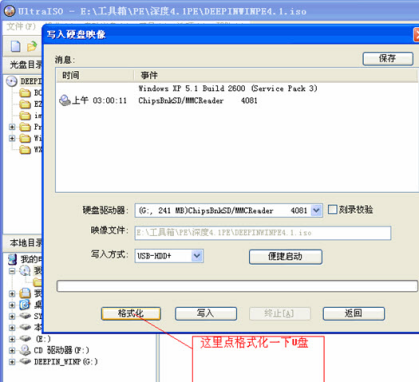
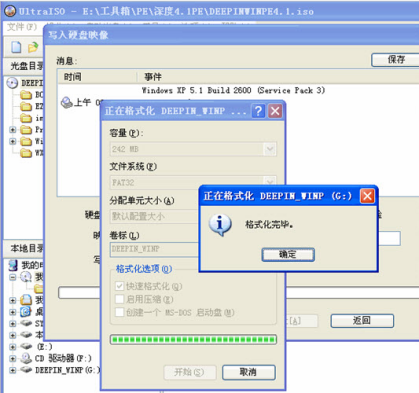
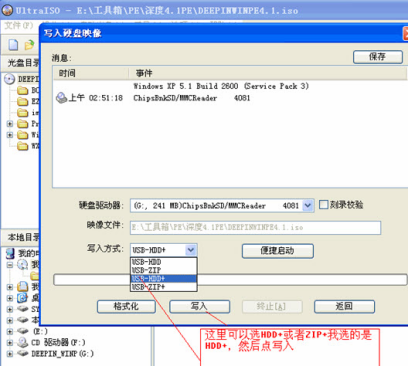
这时格式化完成后,选择【写入方式】,可选择:
USB-HDD/USB-ZIP/USB-HDD+/USB-ZIP+ (小编选的是HDD+,接着点击写入);
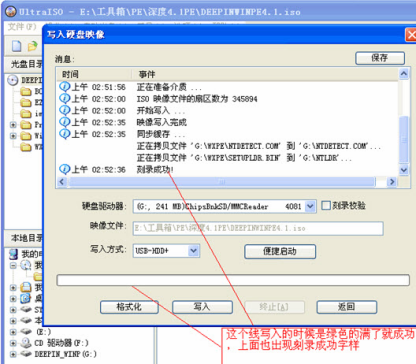
当程序提示刻录成功!的信息,就表示制作成功了(小编不由得长嘘了一口气)。
第二种方法:
准备一个U盘,U盘容量好大一点,因为一般的系统ISO文件都是比较大的,像WIN7 64位ISO文件可以达到3-4G,所以建议用8G以上的U盘;还有就是要准备一个系统ISO,这个可以在网站上下载。
制作过程:
U盘和系统ISO文件准备好了后,接下来就开始制作ultraiso软碟通制作U盘启动
1、把U盘插入电脑USB接口上,打开ultraiso软碟通,并点击左上角的“文件”-“打开”
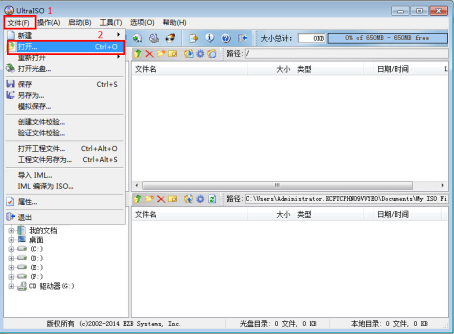
2、打开ISO文件
3、打开完后回到UltraISO窗口,点击菜单栏中的“启动”选“写入硬盘镜像”
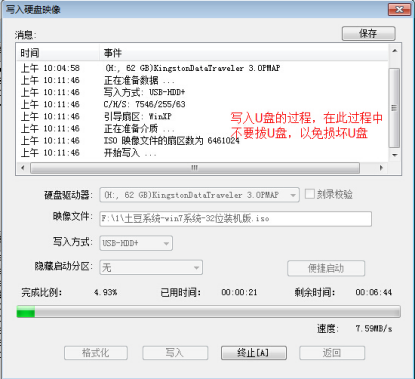
4、弹出如下窗口做好中下图所示后,点击“写入”按钮
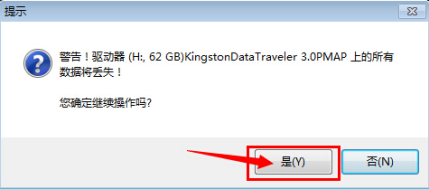
5、再次确认写入(注意备份U盘上的资料)
6、然后写入过程
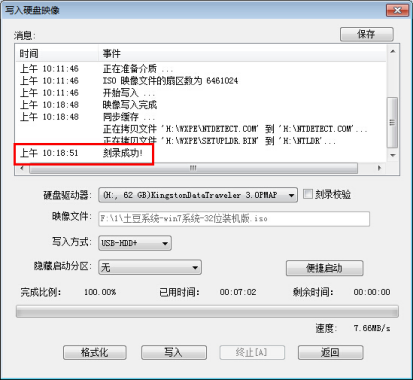
7、写入完成,返回并关闭软件
8、制作成功后,打开“计算机”,发现里面的U图标已经变了,说明ultraiso软碟通制作U盘启动成功了。
看完了上文为各位讲述的UltraISO软碟通制作u盘启动盘的具体流程介绍,你们是不是都学会了呀!