


大家知道逍遥安卓模拟器将转移镜像文件到其它磁盘上的详细步骤吗?下文就是全部内容,相信是值得伙伴们学习的哦!
逍遥安卓模拟器将转移镜像文件到其它磁盘上的详细步骤

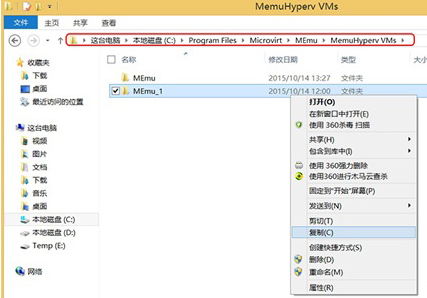
我们先复制“MEmu_1”文件夹 (安装目录MEmuMemuHyperv VMs)
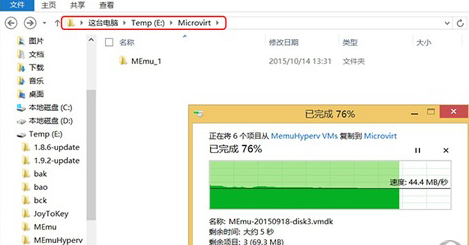
这时我们粘贴到你所想移动的磁盘目录下(如 E:TempMicrovirt)
接着我们打开MEmuConsole.exe,并删除“MEmu_1”
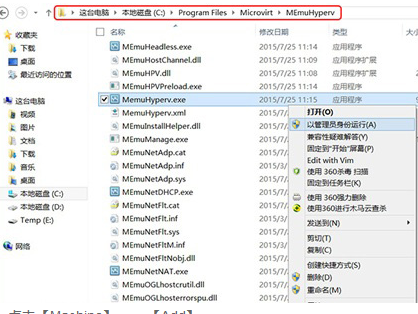
再以管理员身份运行MemuHyperv.exe
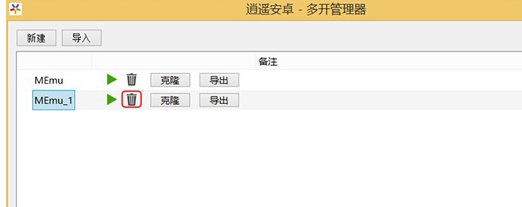
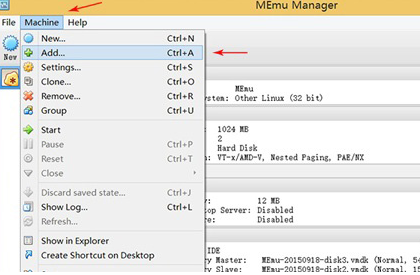
接着我们点击【Machine】------【Add】
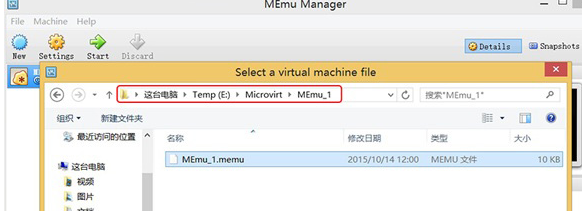
然后我们打开E:TempMicrovirtMEmu_1MEmu_1.memu
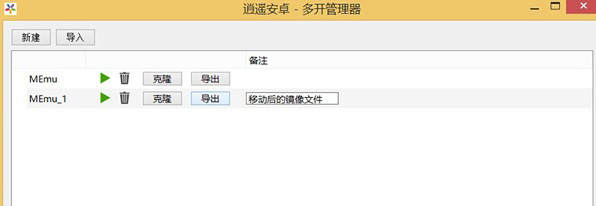
最后我们刷新列表:在任务管理器中结束MEmuConsole的进程后重新启动MEmuConsole.exe
上文就是逍遥安卓模拟器将转移镜像文件到其它磁盘上的详细步骤,你们是不是都学会了呀!