


今天小编带来的是xampp配置虚拟主机的操作方法,可能还有用户不是很熟悉,相信对大家一定会有所帮助的。
xampp配置虚拟主机的操作方法

昨天下午浏览网页的时候发现的xampp,看上去挺专业的。于是乎今天上午尝试着使用了一下,感觉还不错,刚刚配置了个虚拟主机。大体流程和WAMP或是Apache都差不多,把配置过程分享给大家。
1.下载并安装好xampp,这个过程就不掩饰了哇。
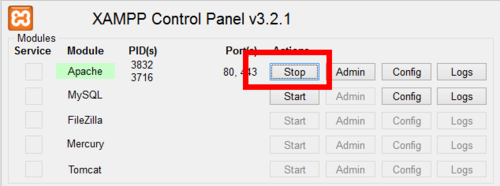
如果已经打开了apache服务器,先将其关掉。接下来进入配置虚拟主机:
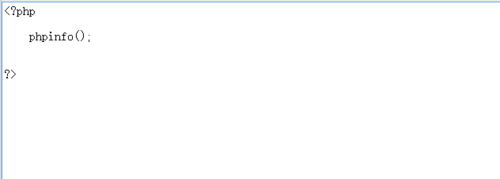
我这里先项目放在了D盘,文件夹名称project,新建一个index.php文件,双击打开文件后写入测试代码:
<?php
phpinfo();
?>
代码什么意思相信大家都懂的!


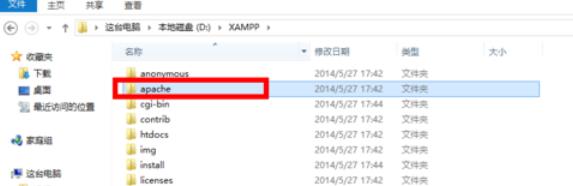
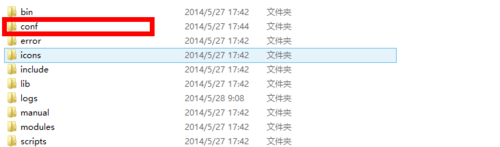
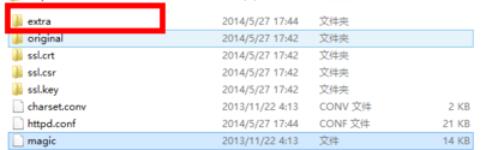
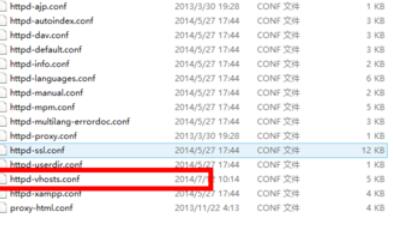
2.找到你的xampp安装目录,依次找到下面的目录:apache目录--conf目录--extra目录--httpd-vhosts.conf文件,使用编辑器打开,notepad等等...
PS:目录的话,大家根据图走就行;
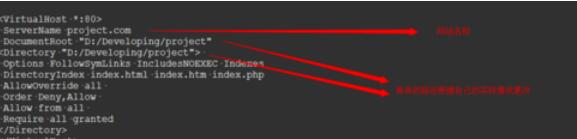
3.打开文件后,在最下边写入如下代码:
ServerName project.com
DocumentRoot "D:/Developing/project"
Options FollowSymLinks IncludesNOEXEC Indexes
DirectoryIndex index.html index.htm index.php
AllowOverride all
Order Deny,Allow
Allow from all
Require all granted
保存。
其中的网站名称和项目路径需要大家根据自己的实际情况去更改,切不可照搬!
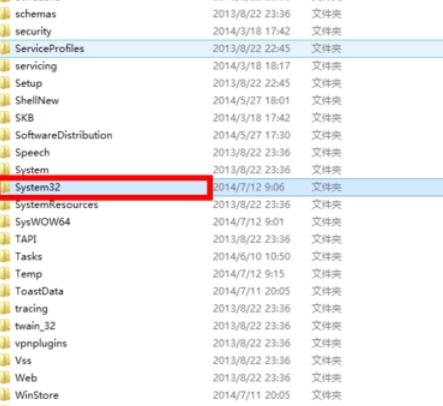
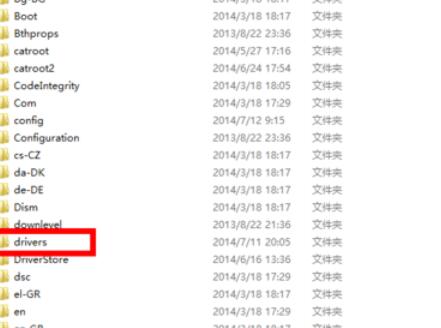
4.打开C盘,依次找到下面的目录:windows目录--system32目录--drivers目录--etc目录--找到hosts文件,使用编辑器打开;

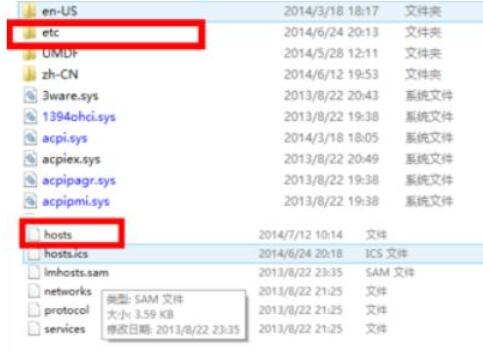
5.最文件最下边加入如下代码:
127.0.0.1 project.com 保存。
启动apache服务器,输入你的网站名称,如果结果和如图一样,则说明xampp配置虚拟主机成功。

上文就是xampp配置虚拟主机的操作方法,赶快试试看吧。