


今天小编讲解了在U启动备份win7系统步骤,下文就是关于在U启动备份win7系统的教程,一起来学习吧。
U启动备份win7系统的使用教程

1、首先,需要进入到PE系统中,因为备份软件都在PE系统的桌面上。在这里,小编选择最经典的“win8pe标准版”。

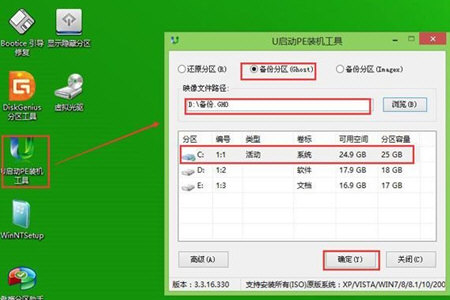
2、在PE系统桌面中找到U启动PE装机工具,然后在”备份分区“功能界面下设置好备份文件的存储路径,在下面的分区中选择系统盘所在的磁盘,一般选择C盘,如果你的系统安装在别的磁盘,同理选择系统所在的磁盘即可。
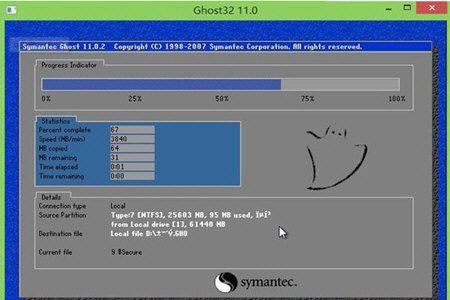
3、确认操作无误之后,等待备份完成即可。
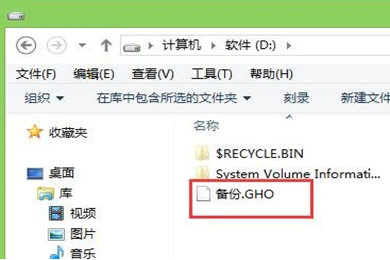
4、最后,在之前设置的文件夹下就可以找到备份的系统文件了。
根据上文讲解的U启动备份win7系统的详细操作步骤,你们是不是都明白啦!