


许多小伙伴还不会考拉FM设置定时推出的简单操作,所以下面就分享了考拉FM设置定时推出的操作方法,希望感兴趣的朋友都来共同学习哦。
考拉FM设置定时推出的简单操作

我们下载安装好考拉FM电台,然后点击打开。
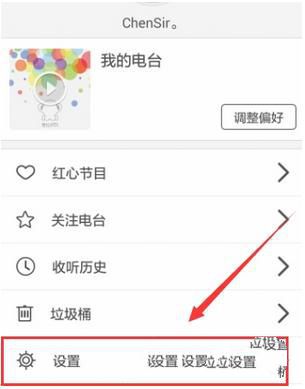
进入考拉FM之后,我们点击【我的】。然后输入自己的考拉帐号登录考拉。

进入之后,我们找到【设置】。
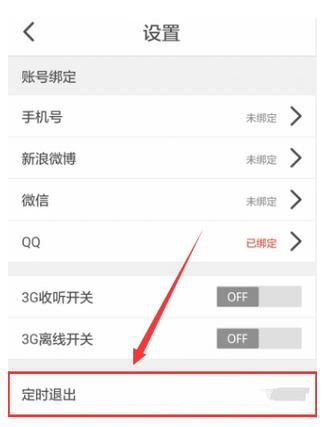
在设置中,我们找到【定时退出】,如图示。
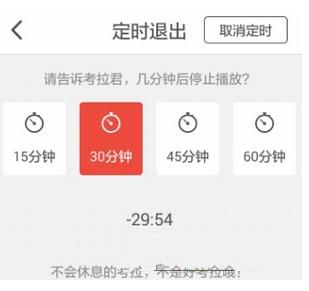
然后我们选择自己想要退出的时间,即可。
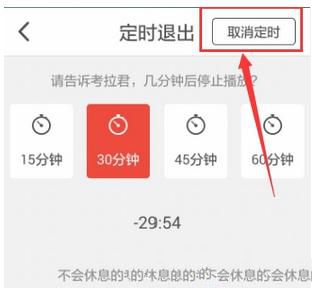
当然如果你现在又不想要定时退出了,我们也可以点击【取消定时】。
上文就讲解了考拉FM设置定时推出的简单操作过程,希望有需要的朋友都来学习哦。