


你们知道在office助手中怎么更改底色吗?下文将介绍在office助手中更改底色的图文教程,有兴趣的可以来了解了解哦。
在office助手中更改底色的图文教程
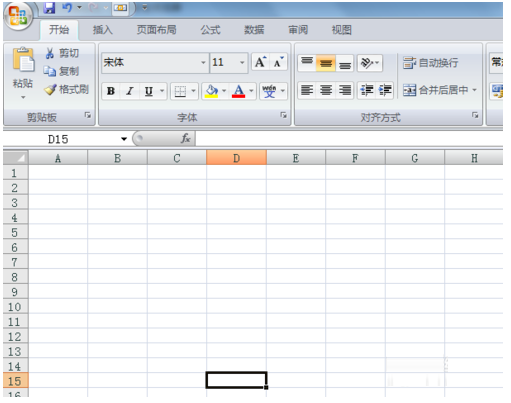
1、首先打开打开office excel表格,可以看到excel表格的界面是银色的。
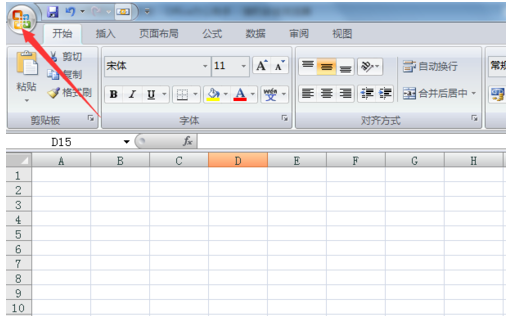
2、点击excel表格左上方的“office”按钮;
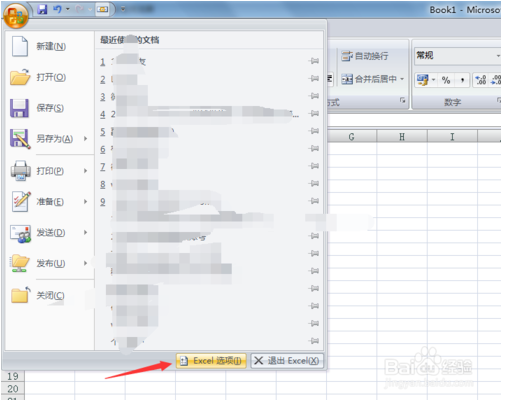
3、在office按钮的下拉菜单中选择“excel选项”
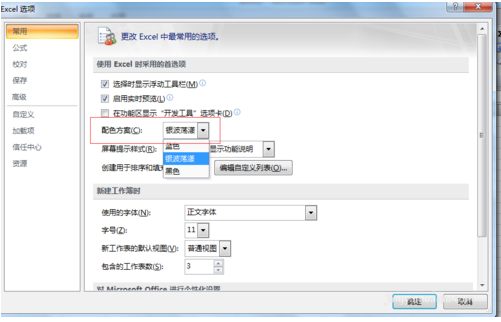
4、在excel选项对话框中,选择常用选项卡;
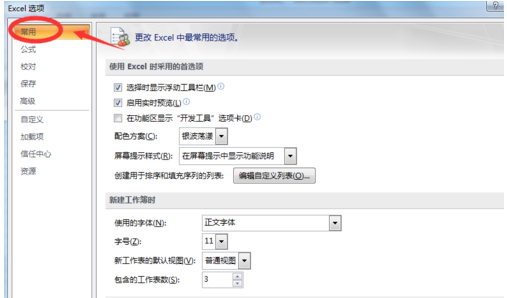
5、在常用选项卡中,会看到有一个配色方案,在其下拉菜单中选择自己想要的界面颜色,这里就先选择蓝色。选好以后点击确认就可以。设置完成以后就可以看到excel表格界面颜色变成了蓝色。
好了,今天关于在office助手中更改底色的图文教程就结束了,你们不妨动手试试看哦。希望对你有所帮助哦。