


outlook用久了会有很多联系人,很多新手用户可能不会分组,为此小编带来了教程帮助大家,下面就来看看outlook怎么设置联系人分组吧。
outlook怎么设置联系人分组?outlook设置联系人分组方法
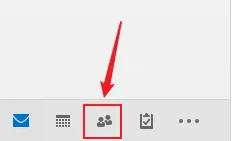
1、首先进入outlook邮箱,然后点击下面的“联系人”。
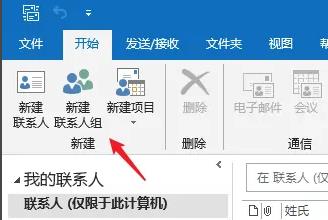
2、然后去点击左上角菜单中的“新建联系人组”。
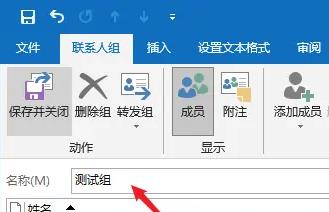
3、在名称中自定义一个联系组。
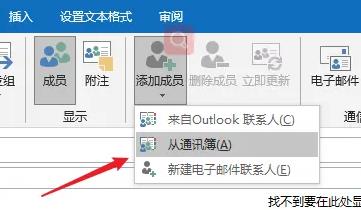
4、接着点击“添加成员”即可加入联系人。
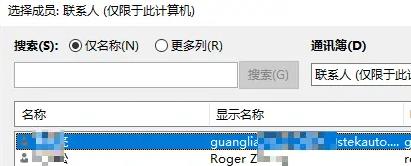
5、打开窗口之后,按住“ctrl+shift”可以选择要加入的联系人。
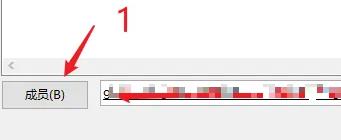
6、再去点击“成员”选择“确定”。
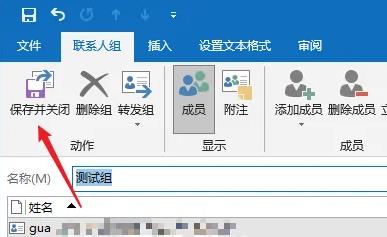
7、最后全部搞定了点击左上角的“保存并关闭”即可。
以上这篇文章就是outlook怎么设置联系人分组的步骤内容,有需要的小伙伴快来学习一下吧!