
 Microsoft Toolkit v2.6B4
 paragon ntfs for mac 中文版v15.5.102
 360安全卫士 14.0
 Crossover 官方版 v18.1.5
 Windows11 ppt 最新版 2021
 360安全浏览器 官方最新
 CentOS免费版是由Linux发行版领头羊Red Hat Enterprise Linux发行的一款免费的社区企业操作系统;
CentOS免费版可以去构建企业级的Linx系统环境,但是不需要进行付费; CentOS免费版会定期更新,支持新的硬件设施,与时俱进。
CentOS免费版是由Linux发行版领头羊Red Hat Enterprise Linux发行的一款免费的社区企业操作系统;
CentOS免费版可以去构建企业级的Linx系统环境,但是不需要进行付费; CentOS免费版会定期更新,支持新的硬件设施,与时俱进。
| 相关软件 | 软件说明 | 下载地址 |
|---|---|---|
| AnyDesk | 控制工具 | 查看 |
| 牛学长苹果数据管理工具 | 最新版 | 查看 |
| Rolan | 官方版 | 查看 |
| Everything | 文件搜索 | 查看 |
| ShowKeyPlus | 中文版 | 查看 |
软件简介
CentOS在Linx的基础上进行了再次的编译,可以通过邮件和论坛等社区进行互动讨论,软件定期更新,接受最新的插件,让用户拥有一个安全、稳定的开发环境。
软件特点
1、改进Red Hat AS的版本,操作指令方面没有太大区别
2、修复RHEL中存在的bug
2、定期更新、兼容最新插件
4、完全免费
安装教程
首先在本网站下载软件安装包,一般电脑中都已有操作系统,比如小编的电脑中含有Windows系统,本次安装在虚拟机中安装。
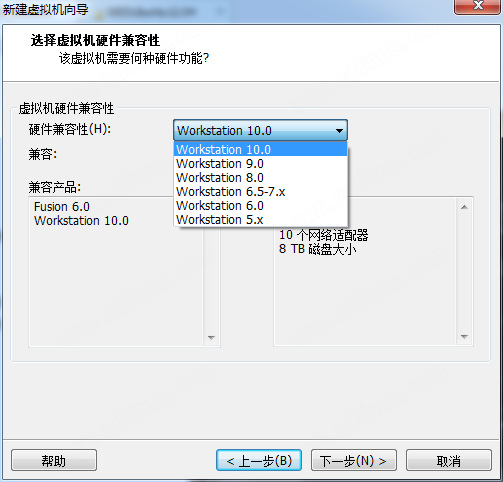
1. 安装虚拟机选择虚拟机硬件兼容性,点击下一步;
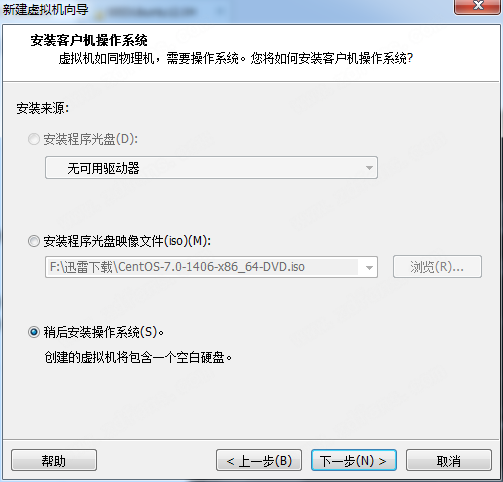
2、安装客户机操作系统,这里我们选择稍后安装操作系统;
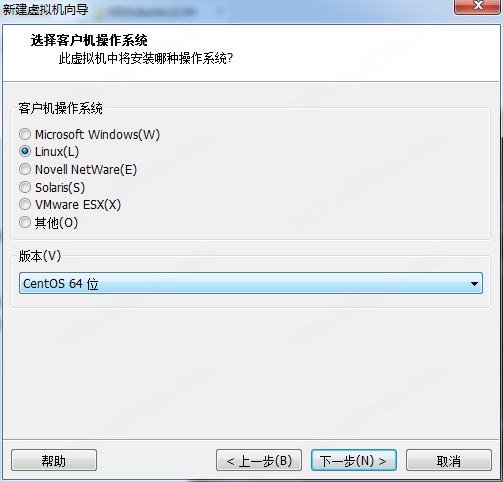
3、这里我们选择客户机的操作系统;
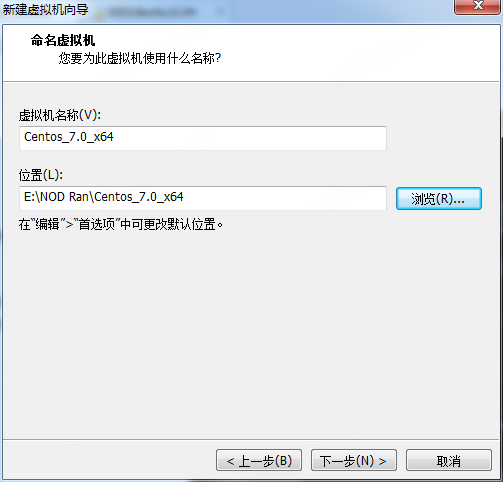
4、这里我们命名虚拟机并且选择它的位置;
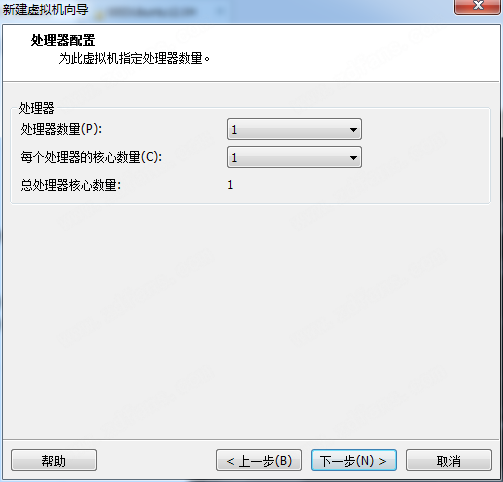
5、处理配置器的调试;
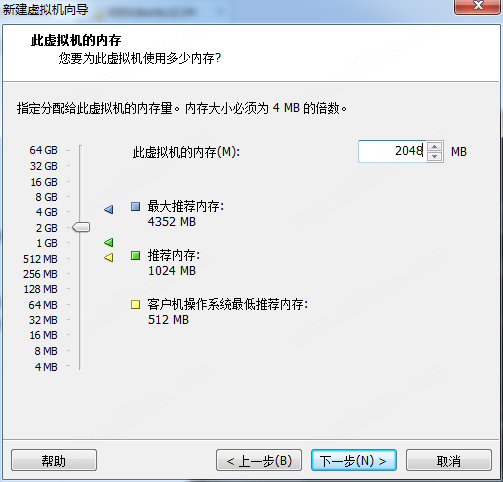
6、设置此虚拟机的内存;
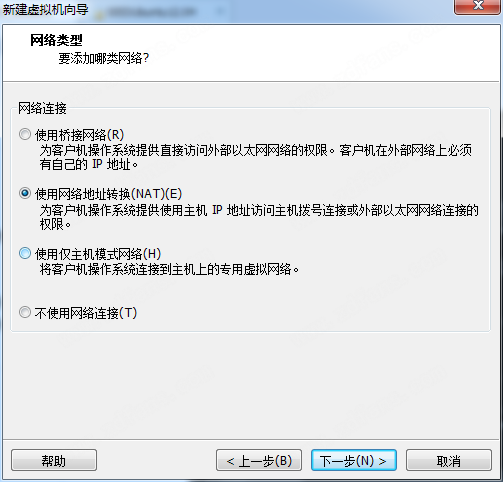
7、我们选择网络类型,小编这里选择了使用网络地址转换;
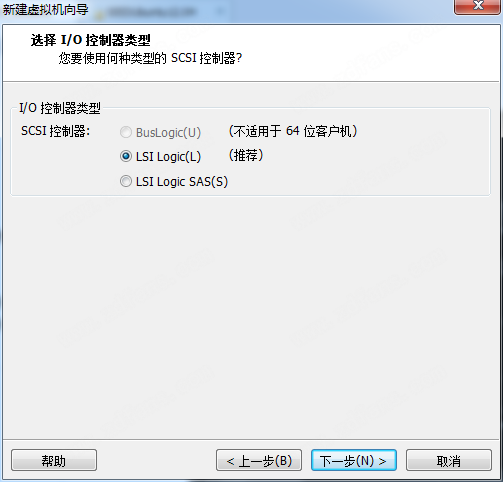
8、选择I/O控制器类型,这里我们选择LSI Logic(推荐);
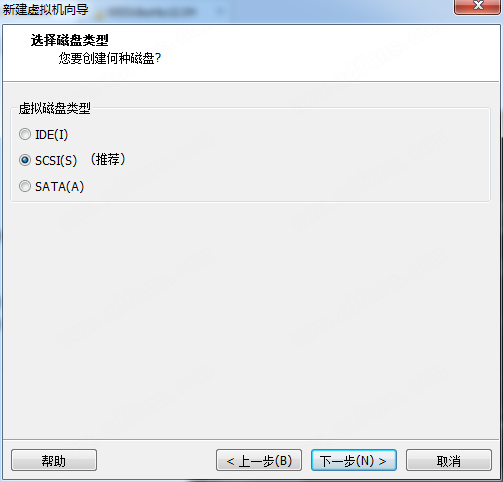
9、选择磁盘类型,我们选择推荐的SCSI类型即可;
10、选择你要使用的磁盘,这里点击创建新虚拟磁盘;

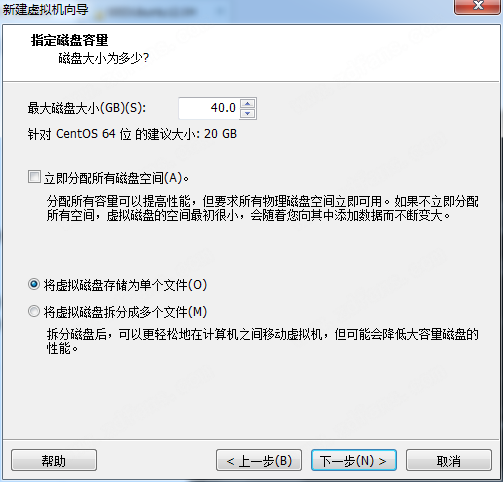
11、现在我们指定磁盘容量,将虚拟磁盘存储为单个文件;
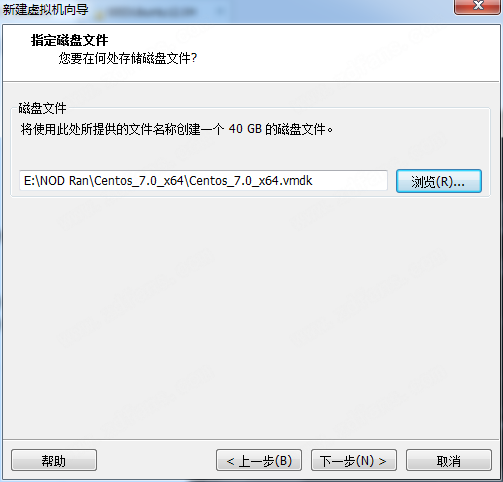
12、接下来我们指定磁盘文件安装使用目录;
13、此时我们已经准备好创建虚拟机,点击完成即可;
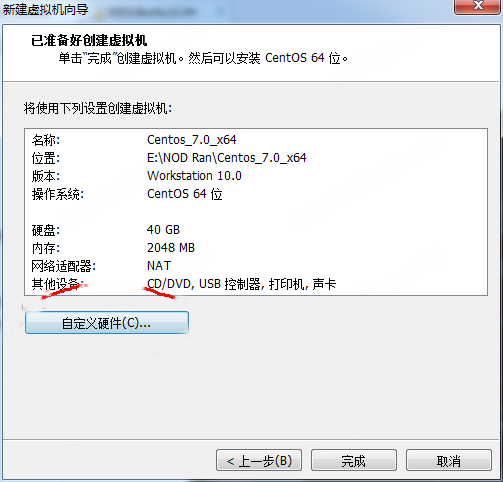
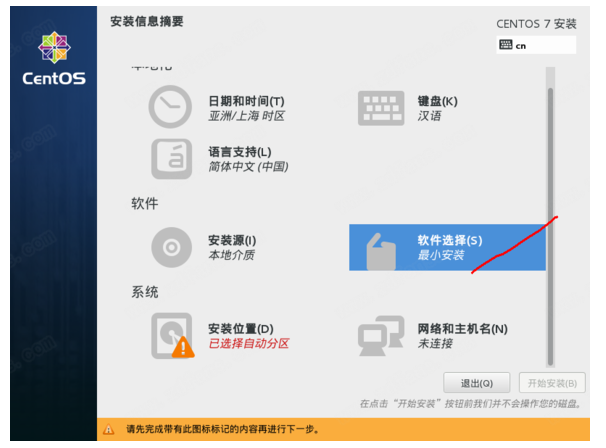
14、此时我们即可安装CentOS的操作系统;
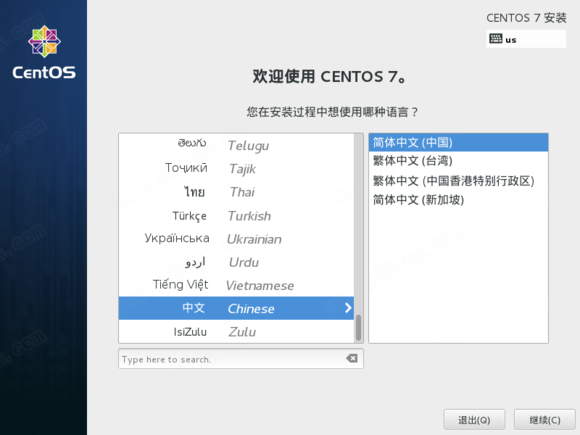
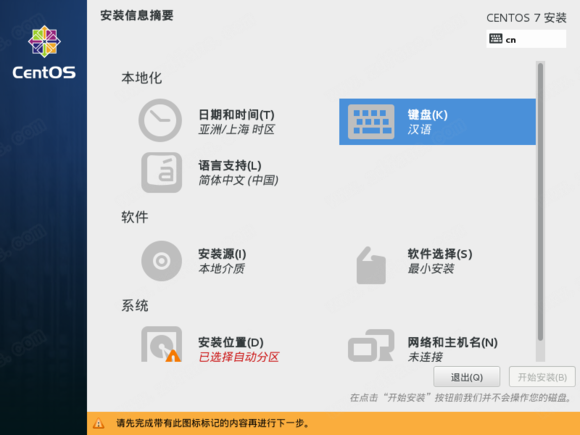
15、点击键盘,选择汉语;
16、点击安装源;
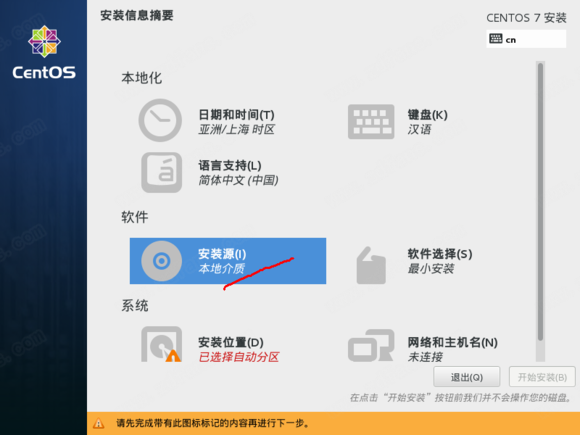
17、选择你需要使用的安装源;

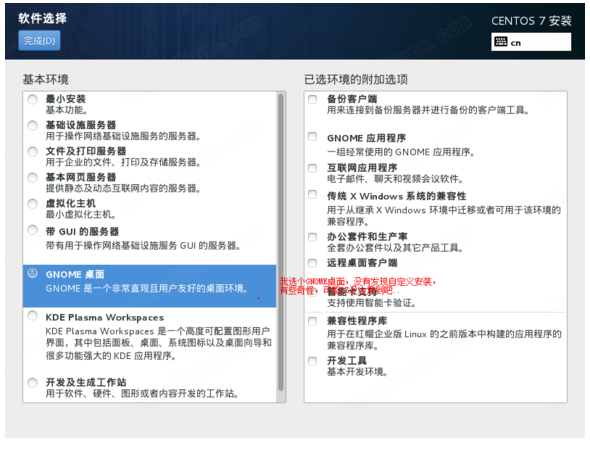
18、此时点击软件选择;
19、这里自己选择一个软件,小编选择的是GNOME桌面;
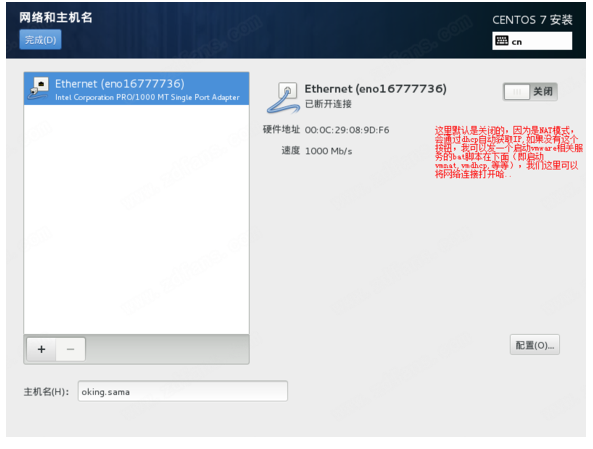
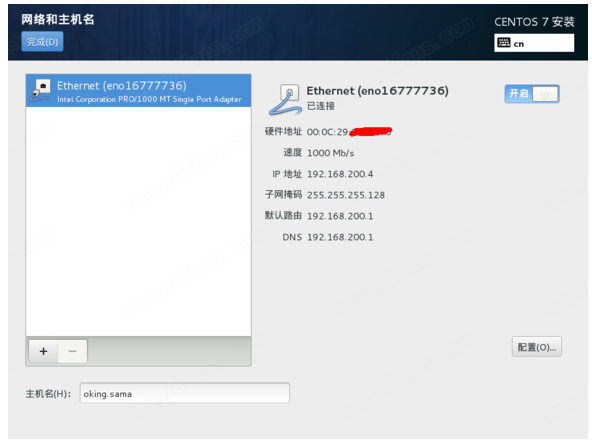
20、此时我们进入网络和主机名,将断开的网络连接打开;
21、此时会出来一些网络连接信息;
22、此时软件完成安装。
安装总结
1、在华军下载下载好CentOS的安装包后,进行解压安装
2、更改默认安装地址,选择合适的安装位置
3、等待安装完成后,即可使用软件。
相关问题
centos是什么系统?
centos是社区企业操作系统
centos密码忘记了怎么办?
首先,打开centos7,在选择进入系统的界面按“e”进入编辑页面;然后按向下键,找到以“Linux16”开头的行,在该行的最后面输入“init=/bin/sh”;接下来按“ctrl+X”组合键进入单用户模式;然后输入“ls”查询当前位置;接下来再输入“mount -o remount,rw /”;然后再输入“passwd”回车;接下来就是修改你的root账号密码了,重复输入一个不少于8位的密码
centos怎么关闭防火墙?
使用命令:systemctl status firewalld.service,查看防火墙的信息;输入指令systemctl stop firewalld.service 即可关闭防火墙
CentOS免费版更新日志
1、不再有LiveCD,用户可将LiveDVD复制到USB key,在需要时使用;
2、GnuTLS支持TLS v1.2。CentOS中使用加密技术的所有软件包现在都支持 TLS v1.2;
3、对postfix、vsftpd、rsyslog7、 ipa-server、389-ds-base、krb5-server、sssd和libvirt进行了功能性的改进;
4、改进Net::SSLeay和IO::Socket:SSL Perl模块以更好地支持TLS;
5、不再支持不安全的加密协议和算法,这会影响到小于1024位的 MD5、SHA0、RC4 和 DH参数的使用;
6、新增cloud-init,用于配置新的云实例;
7、pacemaker现在支持警报代理;
8、clufter已更新至0.59.8版本;
9、包括Mozilla基金会提供的最新证书颁发机构在内的ca证书已更新;
软件特别说明
本站提供虚拟机下载http://www.downza.cn/soft/196105.html