U盘万能驱动 v2.0
 usbkiller 最新版 v3.22
 Rufus 官方版 v4.3
 金士顿U盘修复工具免费版 v1.3
 万能u盘修复工具 绿色免费版
 Etcher 官方版 v1.15.6
 k快启动免费版是一款方便菜鸟专门设计的U盘启动盘制作工具,操作简单文件小,无需任何技术基础轻松搞定一盘多用。k快启动免费版让你的U盘平时以传送数据功能自居,需要时它就是修复盘,没有任何限制对系统不挑剔,配置不挑剔,分分钟让你做个电脑系统伪装高手。

快启动使用界面
软件特色
较小的体积,能够更好、更快的下载,减少用户等待时间。
可以安装在本地磁盘中,可以不用u盘、光驱进行系统重装;又可以安装在u盘中,提升工具的实用性。
使用7z极限压缩技术,更快的解压、安装。
Win03PE系统工具适用各种新旧计算机,工具齐全,并实现一键安装操作。
FAQ
快启动一键重装教程
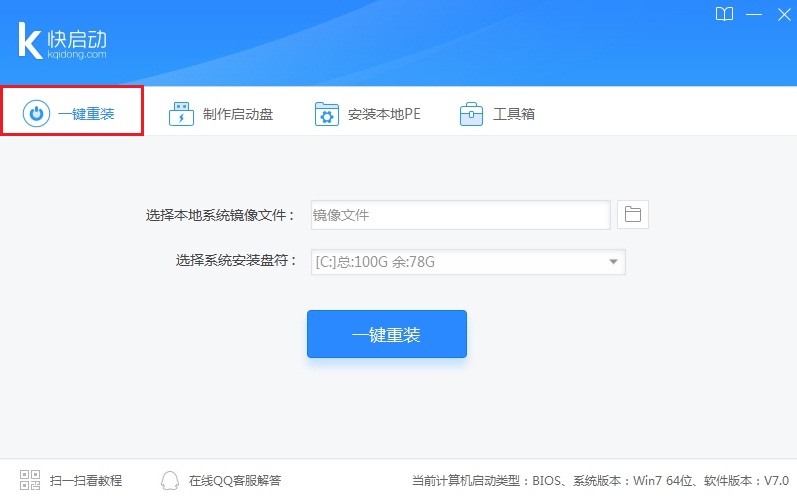
进入快启动
进入快启动一键重装工具窗口,如图所示:
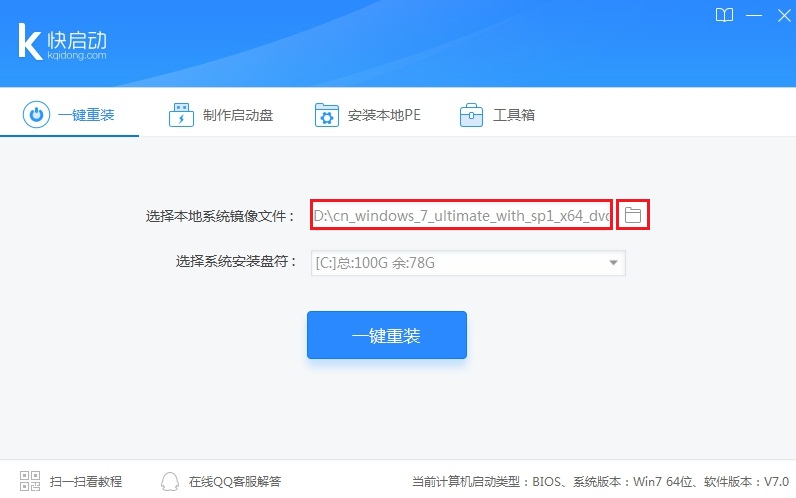
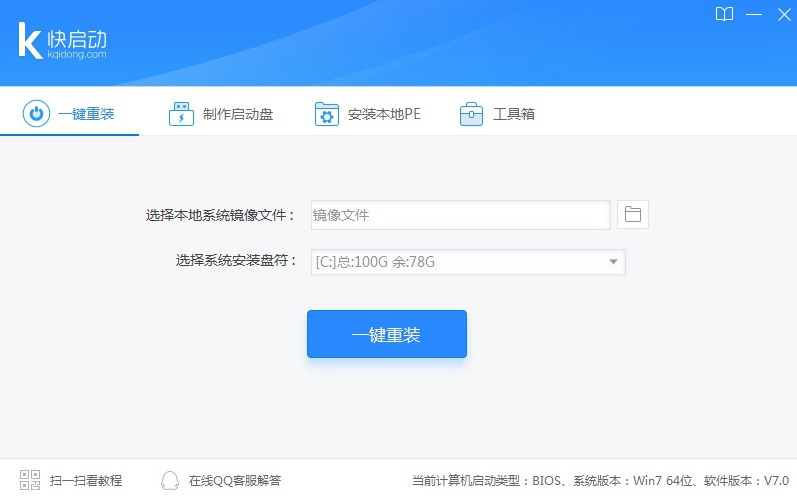
选择系统镜像
点击“选择本地系统镜像文件”右侧小图标将系统镜像文件添加到软件中,如图所示:
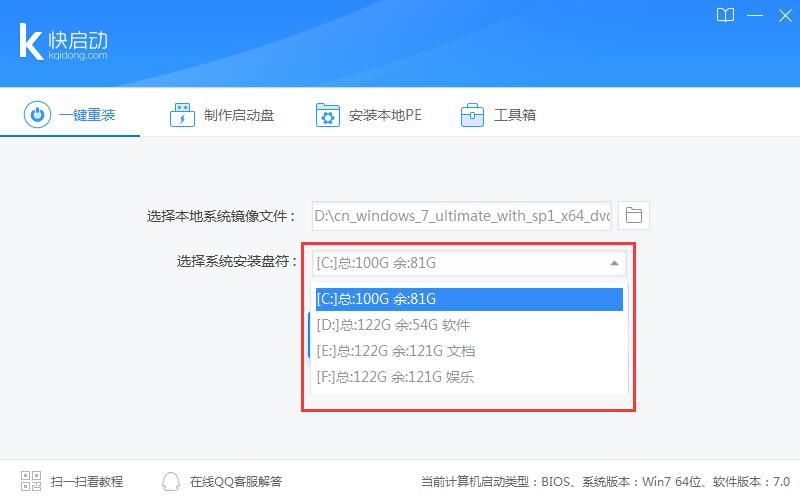
选择系统盘
在小三角下拉框中选择需要安装系统的磁盘将其作为系统盘(以C盘为例),如图所示:
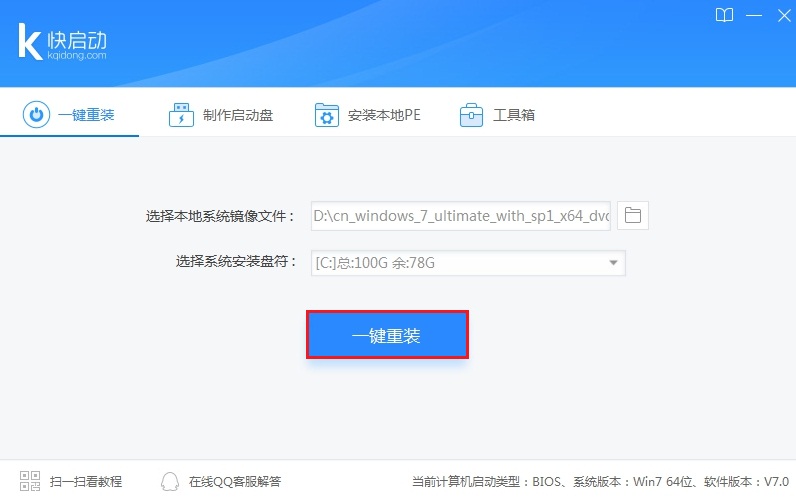
点击“一键重装”
选择系统安装盘后,点击“一键重装”按钮,如图所示:
弹出提示框
随后弹出“此操作会格式化所选磁盘,是否继续一键重装操作”的信息提示窗口,点击“确定”,如图所示:

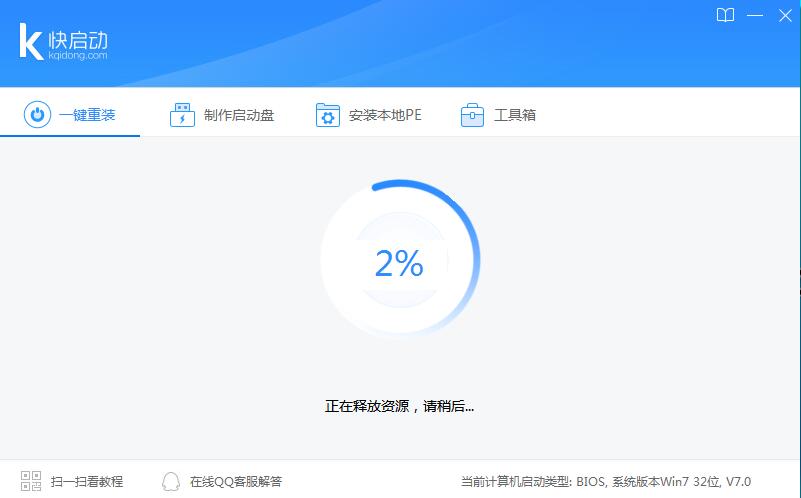
部署装机环境
随后,快启动一键重装工具开始部署装机环境,请耐心等待,如图所示:
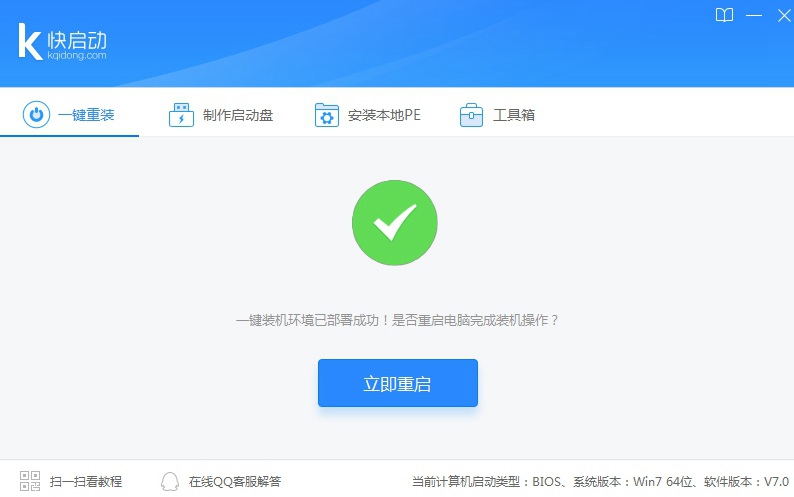
点击“立即重启”
直至完成后点击“立即重启”,如图所示:
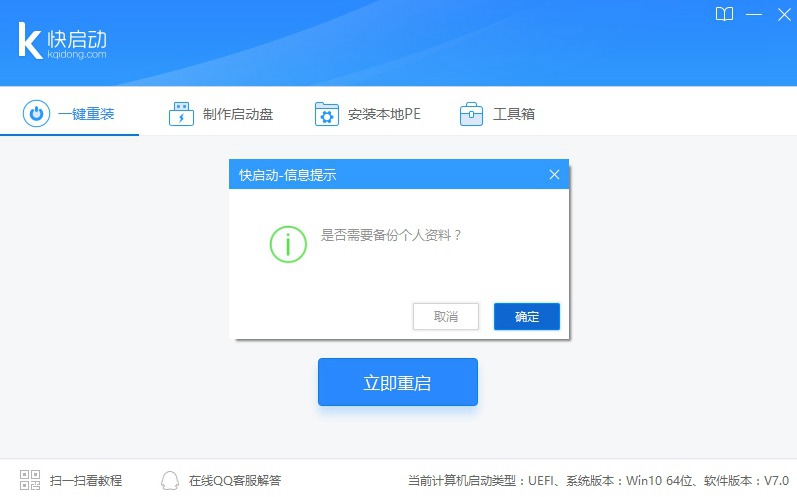
备份系统
随后弹出重启前是否进行一键备份询问窗口,按照个人需求进行备份,即可重启计算机进入系统重装界面,ghost版系统无需任何操作,原版系统则需要填写个人账户信息和个性化设置,然后等待安装完成即可,如图所示:
END
以上即是快启动U盘启动盘制作工具一键重装系统的操作过程,全程一键式,无需学习任何技术,零基础装系统不再是梦想!
安装步骤
一、打开在本站下载的最新版的快启动软件安装包,如下图,可以自定义软件的安装路径。

二、耐心等待软件安装完毕,点击【立即体验】就可以使用了。

使用技巧
快启动U盘启动盘制作教程
进入快启动
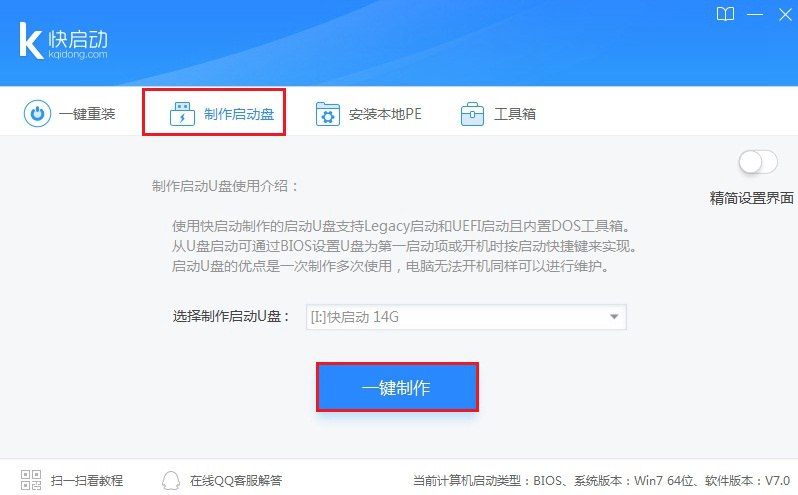
进入快启动U盘启动盘制作工具窗口,如图所示:
备份U盘中文件
选择制作启动盘,插入U盘,备份U盘个人重要文件,因为制作工程中会删除U盘上的所有数据,点击“一键制作”,如图所示:
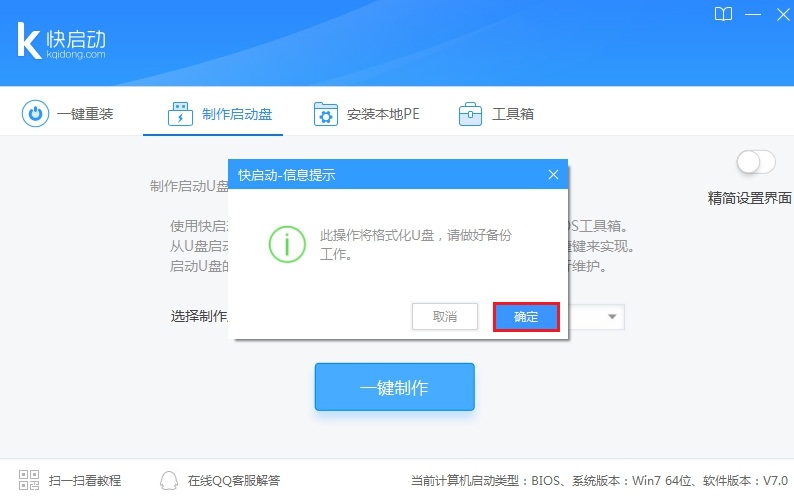
点击“确定”
随即弹出执行此操作会删除u盘中所有数据,且不可恢复的警告提示,点击“确定”按钮,继续操作,如图所示:
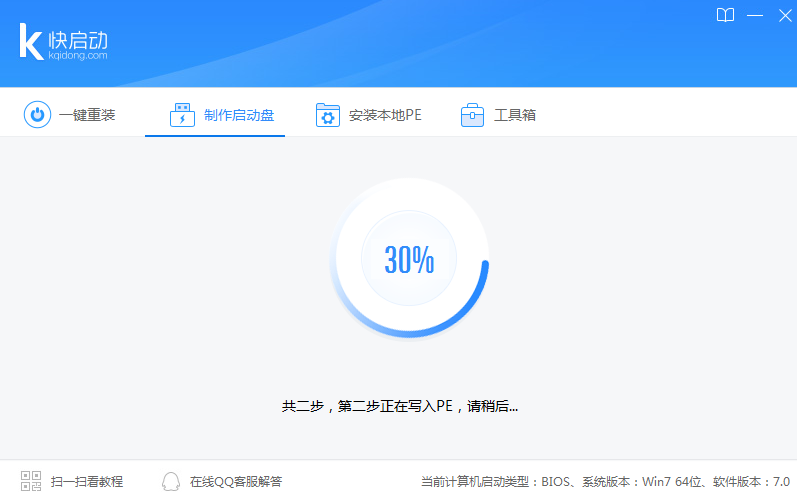
等待数据写入u盘
等待相关数据完成写入u盘,如图所示:
点击“返回”
直到弹出u盘制作成功信息提示,点击“返回”即可,如图所示:

END
到此,一个属于自己的U盘维护工具就这样子做好了,是不是很简单。只要再下载一个系统镜像文件存到快启动U盘启动盘的根目录下,不论是系 统维护还是U盘装系统都不再麻烦!