Batchplot(CAD批量打印工具)安装方法及使用教程

导读:
Batchplot是一款非常好用的CAD批量打印工具,拥有很多强大的功能,下面小编就来跟大家介绍一下Batchplot的安装方法和使用教程。
Batchplot(CAD批量打印工具)安装方法及使用教程。Batchplot是一款非常好用的CAD批量打印工具,拥有很多强大的功能,下面小编就来跟大家介绍一下Batchplot的安装方法和使用教程。
一、安装批量打印程序
方法一:按住 BatchPlot.VLX(请自行搜索下载) 文件不放,直接拖入CAD中即可(但是有缺陷,每次需要打印都需要类似同样的操作)。
方法二、在CAD里面输入 ap(appload)命令
(但是也有缺陷,每次需要打印都需要类似同样的操作)。
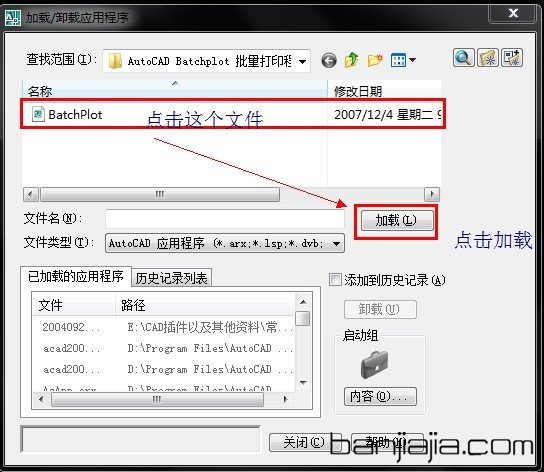
方法三、在CAD里面输入 ap(appload)命令
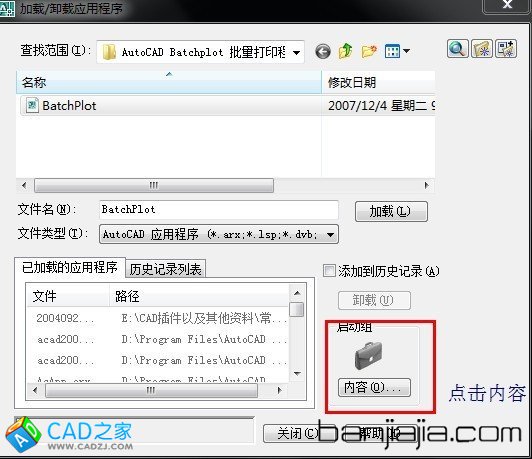
然后,
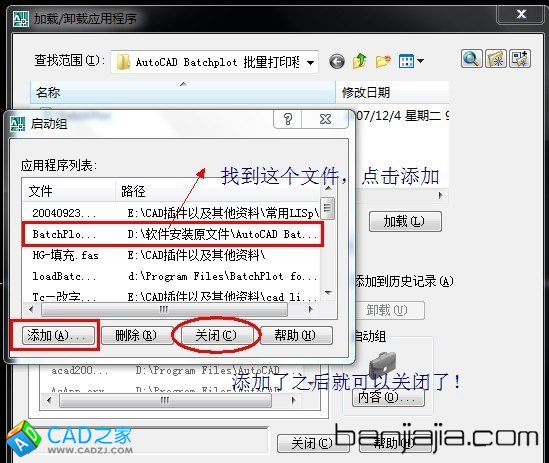
这步进行了之后呢,重新启动CAD就可以了(这个是比较方便的,每次也不用去加载了,就可以直接输入命令,直接用了,小布推荐这个方法)
使用方法:
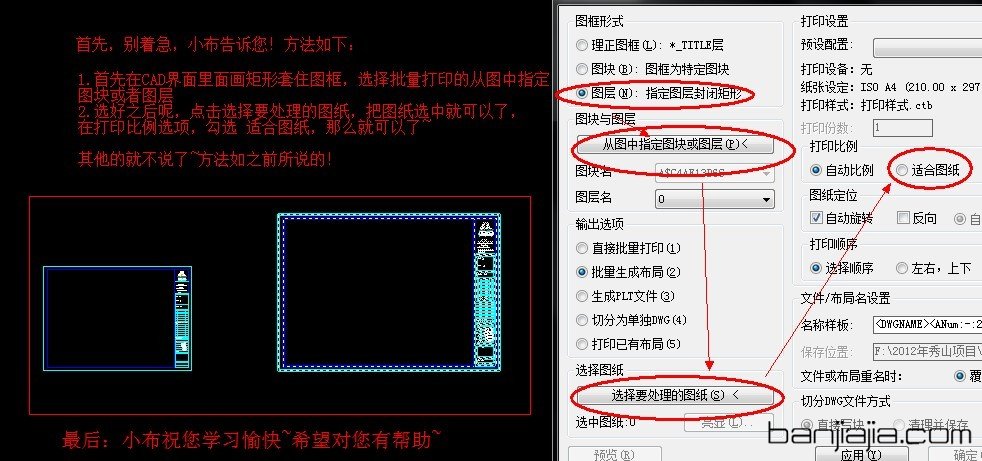
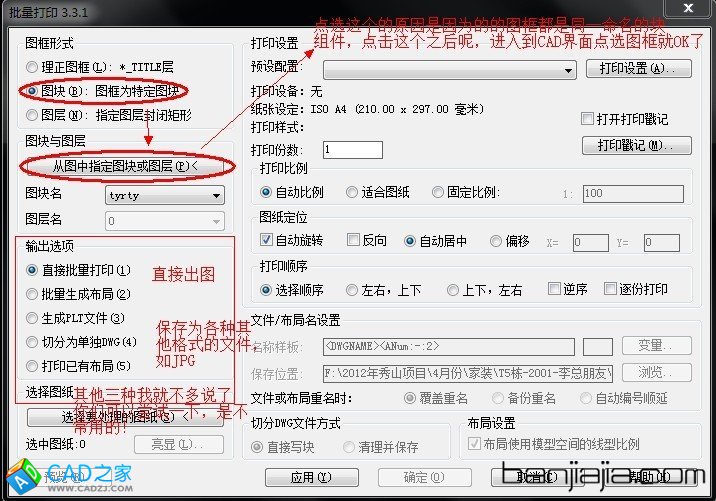
第一步:加载完成后,在CAD命令栏输入 BPLOT 进入批量打印界面~如图:

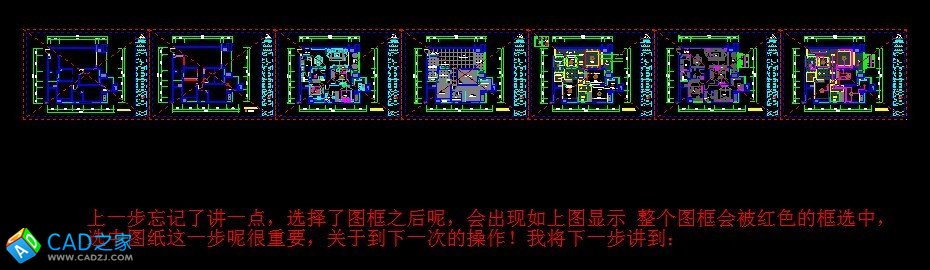
第二步:以上操作完成了呢 就紧接着选择共同命名的图框,然后选择此次任务的基本操作,直接出图?还是生成别的电子文件。如如下图:
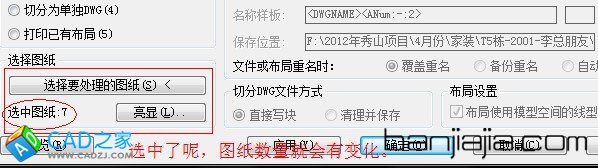
第三步:选择要打印的图纸,如下图:
然后
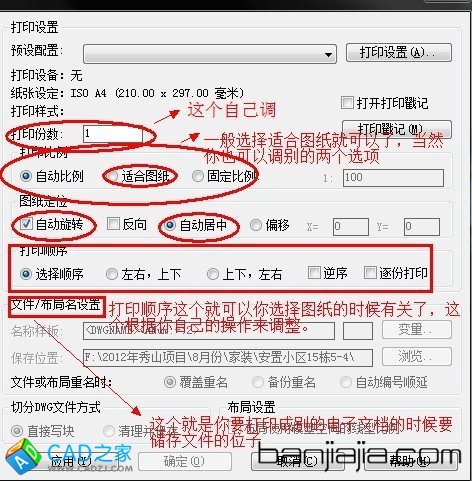
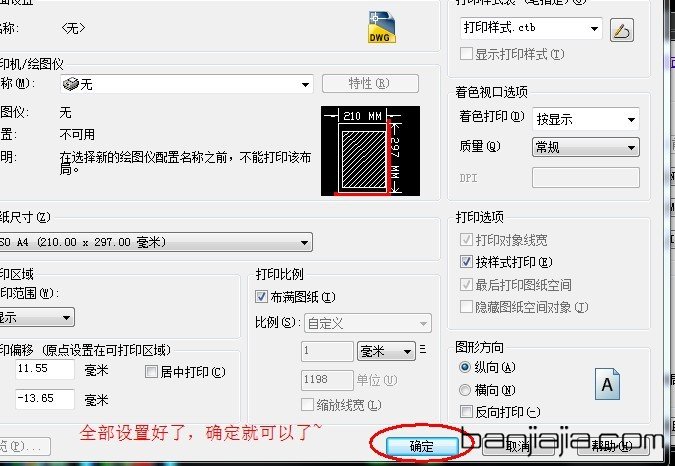
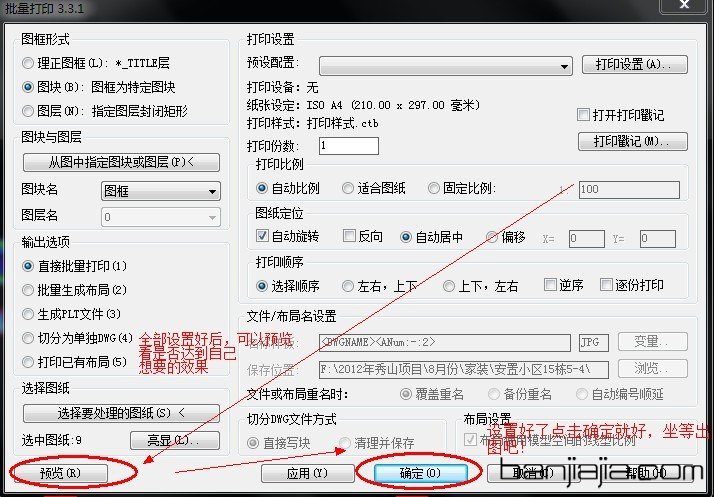
第四步:调整相应设置,如图:
第五步:打印另类电子文档设置,如图:

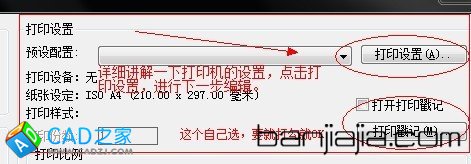
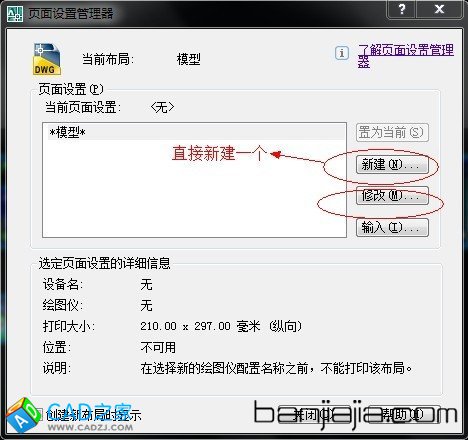
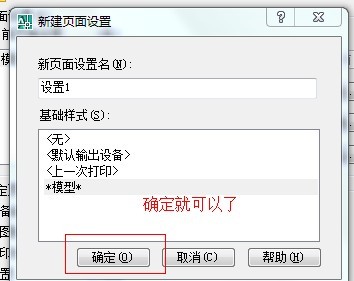
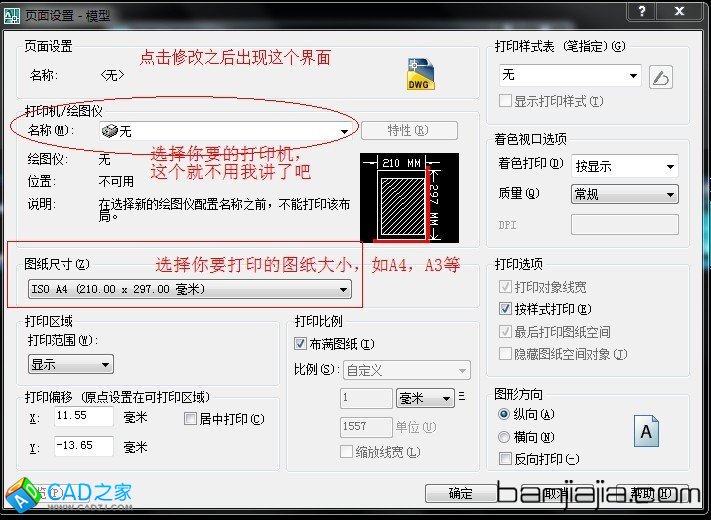
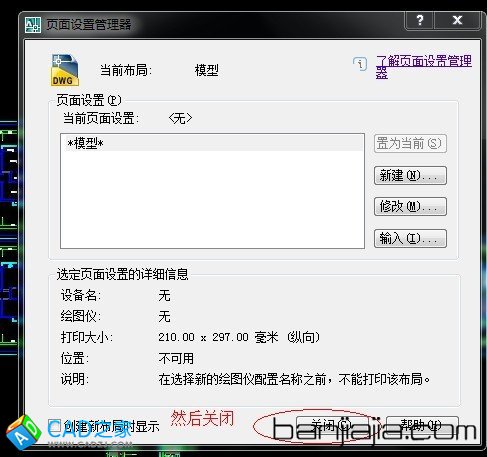
第六步:打印机的设置,如图:
然后
接着
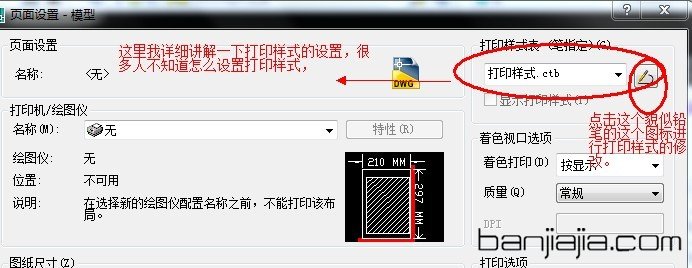
第七步:打印样式的设置,如图:
然后呢 就到线型的设置
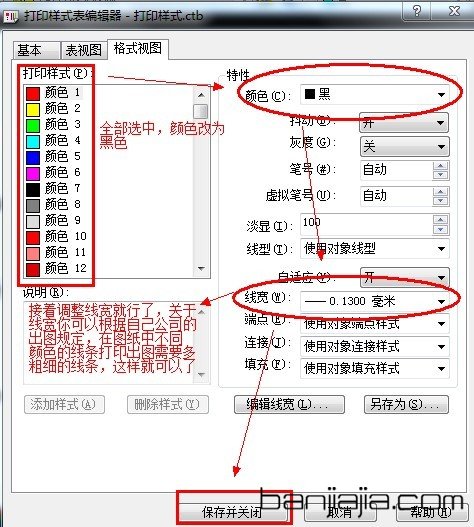
然后
好了,基本的操作就这些了!
最后还有一个方法要分享:就是图框不一样而且不属于同一个命名块怎么办呢?如下图所示:
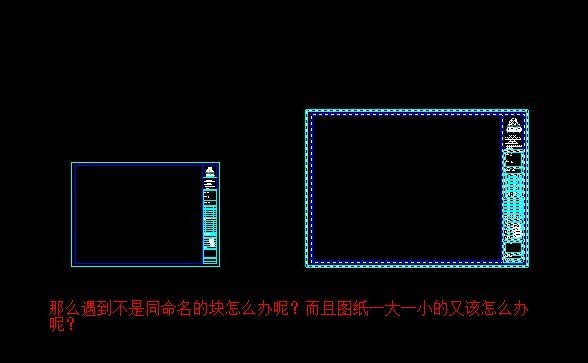
然后呢